

Introduction: Florida Shelf


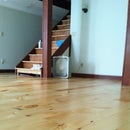
Condo living in Fl is many retirees calling. Includes sunshine, no lawn care, a gate to keep the riffraff out, a place to park your golf cart...
It also comes with limited space and high real estate costs, so when doing a project you have to do it right. This weekend's project was a set of shelves to be used to organize a space dedicated as a mini office.
White crown molding, baseboard and trim are throughout the condo. These shelves were built to be strong, sturdy and follow that look. What follows is a short, simple Instructable documenting this project. Enjoy!
Step 1: Measure and Mark


The owner wanted 2 shelves. We determined the starting height of the bottom shelf, at 60 inches. Measured up off the floor in a few spots and checked with the level to make sure I was projecting a level line. Pencil a line connecting the dots..
In FL wood studs seems to be a luxury, this wall had non. Only metal studs and drywall. Which meant anchors would have to be used for ever screw, and added significant more time than if I could of just screwed into a few studs...
Step 2: Corbel and Supports


To support the shelves I used a 1x2 board on 3 sides and would need a right angle bracket of sorts to support the span in the middle sections between the ends. The Span was 92" and based on the items being placed on the shelf decided to go 13 inches deep.
Apparently those decorative right angle supports used for shelves and other projects are called corbels. Now you know. All the materials for this project came from Lowes and the Depot.
I need to get into the corbel selling business because those pretty decorative items where $30 and up for each one... Half the cost for this project was in corbels alone.
With the corbels being the main visual for this project their placement was of importance. Each corbel was held by 2 screws that are put in the wall and a hidden keyhole bracket on the back of the corbel.
I used zip it/ screw in style anchors for each screw going into the wall. Once I had my corbels in position and lining up, I cut 1x2 boards to length to give me a ledge to set my shelf on.
After boards were cut they were painted twice. I placed the boards in position and screwed through them into the drywall. I backed out my screws and then put anchors in each hole. Then replace the boards and screwed them into my anchors. Repeat...
If you look closely at the corbels and where the ledge boards meet, there is a space left open that has been filled with caulk. I could of tried to trace the curve of the corbel and cut out a section of each board but I opted to use caulk which turned out to be just fine and saved time.
Step 3: Shelfie


May have been a bit of over kill but for the shelves I used 3/4 plywood that was primed on one side. I recently purchased a laser measuring device and used that to verify my span. Fl is known for unsquare buildings so wanted to see if one side of the shelf had to be slightly longer or shorter to fit snugly. Shot a few measurements and was only a 1/32 off so square enough for me! Pretty cool little tool.
I had lowes use their panel saw to cut 2 13" wide strips out of 1 sheet of plywood. Circular saw cut to length and had to notch the back corners with a 45 degree to fit around the corner bead on the wall, but that was it. Painted with 2 coats...
To add strength and to cover up the edge of the plywood a 1x2 board was used on the front edge of the shelves and tied into the wall on each end. It was sanded nicely with 220 grit and painted. Because this was going to be the front edge of the shelve and will be seen head on, wood buttons were used to hide the screws. 3/8" hole had to be drilled to allow the button to be recessed.
Step 4: Finishing Touches


In the trim section of the store I found 1 1/4" corner pieces that I cut down to hide the ends of the shelve ledge, which really ended up being a great touch to give it a finished look. I caulked any gaps and along the edges to really finish this project up. Then the ladies took over went box crazy, Home goods magazine cover right here!
Thanks for taking a look.
Jake


