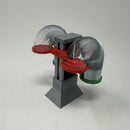
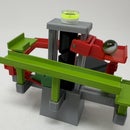
Introduction: Four Whistles
When I am designing a complicated model, I break the major components down to much simpler ones such that I am able to print and test them individually (I like Autodesk Fusion 360 because it supports a design methodology such as this).
The Four Whistles Instructable is one example of such a process, and includes four types of whistles that will eventually become part of a more complicated model. I've never designed whistles before, and after searching Instructables (there are a number of wonderful whistle designers here!) and the web for "how to design a whistle", these are what I came up with that would work in my more complicated model. And the grandkids liked them so much (the parents, well, not so much) that all I was left with was the prototypes, all printed in "draft mode", that appear in the photographs!
Even though these are fairly simple prints, I probably forgot a file or two or something, so if you have any questions, please feel free to ask.
Designed using Autodesk Fusion 360, sliced using Cura 2.3.1, and printed in PLA on an Ultimaker 2+ Extended and an Ultimaker 3 Extended.
Step 1: Whistle Small.
Whistle Small was my first whistle. It is easy to print, requires no supports, and makes a somewhat pleasing sound in a moderate pitch.
I printed this whistle at .1mm vertical resolution with 20% infill and no supports.
My daughter Erika wanted this whistle with the addition of a necklace loop for trips to the park with her dog. The photograph is of this version printed in green at .1mm resolution with 20% infill.
Step 2: Whistle Tri-Tone.
Whistle Tri-Tone was my second whistle and I liked it because my youngest grandson loves to blow it when we play with the Balloon Powered Single Cylinder Air Engine Toy Train (https://www.instructables.com/id/Balloon-Powered-Single-Cylinder-Air-Engine-Toy-Tra/).
I printed this whistle at .1mm vertical resolution with 20% infill both without and with supports. Without supports, there will be minimal clean up inside the whistle mouthpiece. I used a small modeling knife and a flat jewelers file and in less than a minute, the clean up was complete. With supports, it was simple to break away the supporting material from inside the mouthpiece using small needle nose pliers.
With supports you must be careful not to let the slicer put support material in the whistle tubes as it is very difficult to remove (I wonder how I figured this out?). Using Cura 2.3.1, I have the slicer only print support material that is in contact with the build plate, which works great.
Attachments
Step 3: Whistle Tri-Tone Staggered.
Whistle Tri-Tone Staggered makes the tri-tone sound as does Whistle Tri-Tone, it just requires a little less plastic to do so.
I printed this whistle at .1mm vertical resolution with 20% infill both without and with supports. Without supports, there will be minimal clean up inside the whistle mouthpiece. I used a small modeling knife and a flat jewelers file and in less than a minute, the clean up was complete. With supports, it was simple to break away the supporting material from inside the mouthpiece using small needle nose pliers.
With supports you must be careful not to let the slicer put support material in the whistle tubes as it is very difficulty to remove (see the previous whistle). Using Cura 2.3.1, I have the slicer only print support material that is in contact with the build plate, which works great.
Step 4: Whistle Slide.
Whistle Slide was my last whistle. This whistle produces a variety of tones as the whistle slide is moved into and out of the whistle.
Since my grandkids, some quite young, would be playing this whistle, I wanted to print it solid and in one piece to increase the effort required to disassemble it (and perhaps chew on a small piece). In order to print this whistle in one piece, supports are required primarily to break contact between the whistle slide and whistle body.
I printed this whistle at .1mm vertical resolution with 100% infill and with supports. Using Cura 2.3.1, I had the slicer print supports "everywhere", but increased the "support overhang angle" from 60 to 70 degrees. This kept the slicer from placing support in the upper end of the whistle tube which would lock the slide in place, which is not good for a sliding whistle. I tested these settings using Cura 2.3.1 layers view mode before printing in order to avoid printing a sliding whistle that wouldn't slide.
Once printed, I carefully removed the support material from the whistle mouthpiece and in and around the slide using small needle nose pliers.
Those are the whistles, I hope you like them!


