

Introduction: Marblevator, Self Reversing Screw Lift.


I've created many "Marblevators" using various lift techniques to lift a marble from the end of the track back to the start of the track. In "Marblevator, Self Reversing Screw Lift", I've designed a "reversing screw mechanism" incorporating twin travelers. As the reversing screw rotates, the travelers raise and lower two slides and buckets. The buckets pick up a marble from the end the tracks, lift the marble to the start of the tracks, where the buckets dump the marble onto the start of the tracks.
As usual, I probably forgot a file or two or who knows what else, so if you have any questions, please do not hesitate to ask as I do make plenty of mistakes.
Designed using Autodesk Fusion 360, sliced using Ultimaker Cura 4.12.1, 3D printed in PLA and Tough PLA on Ultimaker S5s and an Ultimaker 3e.
Supplies
Soldering Iron and Solder.
Thick cyanoacrylate glue.
Petroleum jelly.
Step 1: Parts.
I acquired the following parts:
- One N20 70RPM 6VDC gear motor.
- One 4 AAA cell battery pack with switch.
- Sixteen 3MM diameter by 1MM thick neodymium magnets.
- One miniature stick on bubble level.
I 3D printed the following parts in PLA at .15mm layer height, 20% infill and no supports unless noted otherwise:
- One "Base.stl".
- One "Cap.stl".
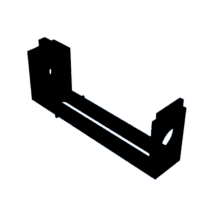
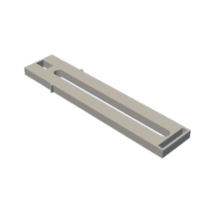
- One "Motor Mount and Traveler Pin Guide.stl".
- One "Screw.stl", .1mm layer height, Tough PLA.
- One "Slide.stl", .1mm layer height, Tough PLA.
- One "Slide(Mirror).stl", .1mm layer height, Tough PLA.
- One "Stand.stl".
- Two "Stop Bar.stl".
- Two "Tower 1.stl
- Two "Tower 2.stl
- Two "Tower 3.stl
- Two "Tower 4.stl
- Two "Track 1.stl
- Two "Track 2.stl
- Two "Track 3.stl
- Two "Track 4.stl
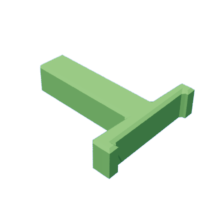
- One "Traveler Pin Guide.stl
- Two "Traveler.stl", .1mm layer height, Tough PLA, supports.
This is a high precision 3D print and assembly model using at times very small precision parts in very tight spaces. Prior to assembly, test fit and trim, file, sand, polish, etc. all parts as necessary for smooth movement of moving surfaces, and tight fit for non moving surfaces. Depending on you printer, your printer settings and the colors you chose, more or less trimming, filing, sanding and/or polishing may be required. Carefully file all edges that contacted the build plate to make absolutely certain that all build plate "ooze" is removed and that all edges are smooth. I used small jewelers files and plenty of patience to perform this step.
Attachments


Step 2: Assemble the Reversing Screw Mechanism.


To assemble the reversing screw mechanism, I performed the following steps:
- Stuck the bubble level to the top of "Cap.stl".
- Temporarily adhered one "Traveler.stl" to "Motor Mount and Traveler Pin Guide.stl" using petroleum jelly as shown.
- Positioned "Screw.stl" into the assembly, sliding the axle into the round hole in the top of the assembly, and making certain the traveler was properly positioned in the screw upper turn around.
- Slid the motor into the assembly with the motor shaft fully inserted into the screw.
- Temporarily adhered the remaining "Traveler.stl" to the screw lower turn around.
- Pressed "Traveler Pin Guide.stl" onto the assembly.
- Pressed the cap assembly onto the top of the mechanism.
- Pressed two neodymium magnets into the slide portion of "Slide.stl".
- Pressed this slide (with bucket removed) around the traveler pin and track.
- Pressed two neodymium magnets into the slide portion of "Slide (Mirror).stl".
- Pressed this slide (again, with bucket removed) around the remaining traveler pin and track.
Step 3: Assemble the Track.


To assemble the track, I performed the following steps:
- Glued "Tower 1.stl" into "Track 1.stl" making certain the track 1 entrance was opposite from the tower 1 leg.
- Slid one "Stop.stl" onto the tower 1 leg as shown.
- Glued "Tower 2.stl" into Track 2.stl" and "Tower 3.stl" into "Track 3.stl".
- With all tracks complete, I pressed them into "Base.stl" oriented such that the tracks created a downhill slope, with the underside of tower 1 36MM from the top of the base, the underside of tower 2 26MM from the top of the base, the underside of tower 3 16mm from the top of the base, and the underside of tower 4 3MM from the top of the base, making certain each tower was perpendicular to the base.
- Pressed two neodymium magnets into "Tower 4.stl".
- Pressed two neodymium magnets into "Track 4.stl" matching the polarity of tower 4 magnets.
- Positioned track 4 into tower 4 with the ball sockets aligned and making certain the track pivoted down with ease and returned to horizontal when released.
- Positioned the stops such that the bottom of the stop was 20MM from the top of the base.
- Lightly glued the track components to the base with small dots of glue such that the components can be finally positioned later.
Step 4: Final Assembly.


For final assembly, I performed the following steps:
- Pressed the reversing screw assembly fully into the track assembly.
- Pressed two neodymium magnets into each of the bucket portions of "Slide.stl" and "Slide (Mirror).stl, matching the polarity of the associated slide magnets, then snapped the buckets onto the slides making certain the buckets pivoted down with ease and returned to horizontal when released.
- Slid the battery pack wires through "Stand.stl".
- Soldered the battery pack wires to the gear motor.
- Pressed the stand onto the track assembly.
- Installed batteries into the battery pack.
With assembly complete, I turned on the battery pack switch, made certain the mechanism was level, added a marble to the track, then made any final adjustments necessary for proper operation. After all adjustments were complete, I added the remaining two marbles and this Marblevator was complete!
And that is how I 3D printed, assembled and adjusted "Marblevator, Self Reversing Screw Lift".
I hope you enjoyed it!


