

Introduction: Wooden Air Hockey Table With Led Lights


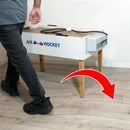
I built this Air Hockey Table from wooden boards of our old replaced kitchen.
I thought what to do with these boards... Then I remembered that I have some few years old network cabinet fans that I can use for a hockey table...
I built the table in smaller dimensions, so my 3 & 5.5 years old kids would be able to play with it, but me and my wife played as well, on our knees :)
Unfortunately, I didn't take pictures of all steps, but I'll try to explain as much as possible.
Check out my other instructables, and my youtube channel.
I'm participating on the 'Make it glow' contest. If you like my Instructable, please vote on the Vote button at the end of this page, or at this link - Make It Glow Contest
Thank you. Enjoy.
Step 1: Required Materials & Tools
General List of tools I'm using - https://www.itzikdiy.com/tools-list?m=1
Tools in this Instructable:
- Jigsaw (I used this saw)
- Drill / Screwdriver
- Super 7 glue
- Wood filler
- Wood glue
- Measuring tape
- Utility knife
Required Materials:
- Wood boards (18mm)
- 4x4 wood profile (for the legs)
- 2 big Lego blocks + 8cm round profile wood + Left fabric (Optionally, for the handles, see later)
- Led strips + power adapter (12V or 5V or other, depending on the strip type)
- 2 electric fans or more (depend on the type, see later)
- 2 perforated trays (optionally, for the gates, see later)
- 2 or more Hockey discs.
- A printer (optionally, see later)
- Electrical cable clamp connectors
- Electrical Wires.
- Female + male electric plugs
- Electric Switch (Gewiss)
- Screws
- Table Score counters
- Color spray
Step 2: General Structure Description
The table is built from 3 layers of boards:
1. The top, with lots of holes to make the hockey disc move smoothly.
2. The middle, with the fans upward, to compress the air towards the top layer.
3. The bottom, for protection - covering the fans, wires etc.
Step 3: Making the Table Frame and Top Board


As I mentioned, I had some boards from our old kitchen.
I had some boards of drawers, with height of 21 cm which I used for the frame,
and a board of 90x50 cm which I used for the top board.
I cut with a jigsaw, 2 gates on the 2 sides of the frame, with a width of 18 cm, 3 cm height. (Later I found that this is too small, since the handles can block the disc if they are in the middle, so I suggest to increase the width to make the game harder...)
I connected the frame around the top board with screws, outside from the frame itself. I left 3 cm space from the top edge of the frame (same as the height of the gates holes). This will be the fence for the disc...
Later, I connected some wood strips with height of few centimeters, in the inner side of the frame, below the top board, to create the space for the next layer board (with the fans).
Step 4: Making the Holes (a Lot...)


I thought how to make the holes on the top board.
I initially thought to draw lines on top of the board, with a ruler, but later I decided to make a grid on the computer, print it on some pages, and drill the holes directly. Each square in the grid was 2 cm x 2 cm.
So... I had 1056 holes!!! (24 x 44). It took few hours to drill them... :)
I think that I used 2mm drill.
I'm sure that there are automatic ways to make these holes, but I don't have such machine...
Step 5: Making the Fans Board


As I explain before, I had some old network cabinet fans (220V).
I assume that maybe you can use 12V fans or 5V of PC, but it should be strong ones and maybe you'll need more than 2 fans.
I connected both fans wires using electrical cable clamp connectors and to a third cable with a male electric plug.
I did 2 circular holes with the diameter of the fans, on 2 boards (you can use one, it doesn't matter) and connected the fans, with the wind side, upwards.
I'm not sure if it makes the difference, but I put each fans in distance of one third of the tables length, in order to have an equal distribution of the air...
Then, I connected the boards with screws to the wood strips that I put before.
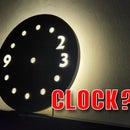
Step 6: Adding Colorful RGB Led Lights

I didn't plan it initially, but later I decided to make the table more interesting and added RGB led strips.
I had 5V USB RGB led strips of tv back lights.
I though how to supply 5V on the 220V table, and decided to use a charger of and old mobile phone, with a 5V USB plug.
I added an electric female plug inside, in order to connect the charger and a switch for the whole electric system, which I'll connect on a later step, to the lowest layer board.
I drilled hole on each side of the frame, positioned near the place planned for the gates, and took out the led strips outside on both sides. Later you'll see where I connected them.
Step 7: Making the Lowest Board

I made some legs, from 4x4 wood profile and connected to the frame from inside.
Later, I took a board for the lowest layer. I left 2 spaces on both sides, to allow air flow to the fans.
I made a rectangular hole for the electric switch and connected the switch and covered it. (gewiss switch)
Then, I connected the board with screws.
The table is almost done. All of the holes of the screws around, were covered using a wood filler.
Step 8: Making the Gates

I initially thought to make the gates from wood but later I found 2 unused perforated trays for draining dishes, bought from IKEA (GRUNDVATTNET) and decided to use them.
I cut holes on the perforated side, using an utility knife, to allow access to the discs entered the gates. (see later step picture)
Step 9: Connecting the Led Strips


I connected the led strips using super 7 glue, to the inner side of each tray, in a high position around it, in a way that it won't be visible later from outside (unless you bend down...).
Then I connected both gates with screws, on each side.
Step 10: Adding Score Counters

I bought 2 cheap score countes on Ebay and connected on each side of the table, using screws.
Step 11: Making the Handles


I decided to make the hockey handles myself. I prepared 3, one spare.
I cut 3 pieces with 1cm thickness, from a 8cm diameter round wood profile, for the base.
I took 3 parts of big Lego block, to use as the handles.
First, I connected 3 pieces of wood with the size of the inner side of the Lego, to the round base pieces I prepared, with a wood glue and screw from the below.
Later, I connected the lego parts on top of each wood piece, using super 7 glue.
Step 12: Making the Handles Smoother


I painted the handles with a color spray and after that, I glued a Felt fabric on the bottom of each handle, to make move smoothly on the top board.
Step 13: Playing...


I didn't prepare the hockey disc, but bought some.
That's it. It's time to play :)
Hope you like this instructable.
Your comments and questions about the project are welcome...
Check out my other instructables, and my youtube channel.
Itzik.
Step 14: Videos

Participated in the
Make it Glow Contest 2018


