

Introduction: Marblevator, Halloween.


A Halloween themed Marblevator, Happy Halloween!
Designed using Autodesk Fusion 360, sliced using Ultimaker Cura 4.11.0 Engineering Profile, and 3D printed in PLA on Ultimaker S5s.
Supplies
- Red and black 28AWG stranded wire.
- Soldering Iron.
- Solder.
- Thick cyanoacrylate glue.
Step 1: Parts.
I acquired the following parts:
- One N20 6VDC 60RPM gear motor.
- One 6VDC power supply with a male coaxial connector.
- One coaxial female connector compatible with the power supply connector that fits in a 9mm hole with a 12mm mm shoulder
- Seven 8mm ball bearings.
I 3D printed one each of all parts at .15mm layer height, no supports.
Prior to assembly, I test fitted and trimmed, filed, drilled, sanded, etc. all parts as necessary for smooth movement of moving surfaces, and tight fit for non moving surfaces. Depending on your slicer, printer, printer settings and the colors you chose, more or less trimming, filing, drilling and/or sanding may be required to successfully recreate this model. I carefully filed all edges that contacted the build plate to make absolutely certain that all build plate "ooze" is removed and that all edges are smooth using small jewelers files and plenty of patience. Using the track and guide, I then manually tested the marble lifting mechanism and carefully filed and sanded the exit and entry track areas as required for smooth entry and exit operation.
Attachments


Step 2: Assembly and Operation.


To assemble the model, I performed the following steps:
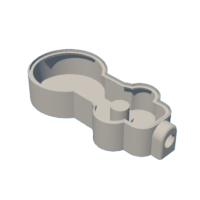
- Glued "Stem.stl" to the top of "Head.stl".
- Glue "Lifter.stl" into the lifter slot inside of the head such that the lifter aligned with the top of the slot (the slot end closest to the top of the head).
- Glued "Face.stl" into the head assembly.
- Slid "Guide.stl" into "Track.stl" and aligned the guide slot with the exit ramp on the track.
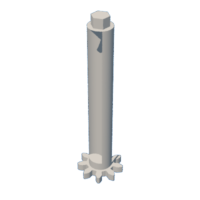
- Glued "Cam.stl" onto the guide such that the highest point on the cam faced opposite of the slot in the guide.
- Pressed "Hinge Pin.stl" partway into the hinge inside the head assembly.
- Positioned the head assembly around the hinge slot in the track, then fully inserted the hinge pin.
- Soldered a red wire to the motor "+" terminal, and a black wire to the motor "-" terminal.
- Slid the motor into the track assembly.
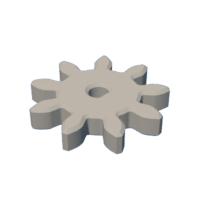
- Pressed "Gear, Motor.stl" onto the gear motor shaft.
- Ran the wires down through the wiring holes in the track assembly then out through the bottom.
- Pressed "Cover, Motor.stl" onto the track assembly.
- Soldered the motor wires to the female coaxial connector then applied power and made sure the motor turned counter clockwise when viewed from the motor gear.
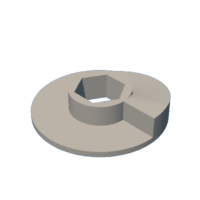
- Slid the coaxial connector into the hole in "Base.stl", then secured in place with the included washer and nut.
- Carefully positioned the wires away from the gears then pressed the track assembly into the base assembly.
As seen in the video, I plugged the 6VDC power supply into the coaxial connector, added seven marbles, and off it went!
And that is how I 3D printed and assembled "Marblevator, Halloween".
I hope you enjoyed it!

Participated in the
Halloween Contest


