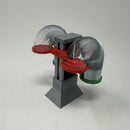
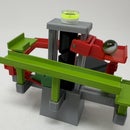
Introduction: Marblevator, Perpetual?, Version 2.
I designed this model to mimic the operation of a few new "perpetual motion" devices that have yet again been appearing in my suggested video feed. "Marblevator, Perpetual?, Version 2" like "Marblevator, Perpetual?" is not perpetual motion, but it sure is quiet with the only noise being that of the marble as it swooshes around the track.
The 3D printed portion of the model consists of only three components, the base, top and a sloped track. Without any assistance, the marble (ball bearing) when placed at the high point of the track will roll down the track slope until it comes upon the track uphill portion, where it will stop and reverse direction thanks to gravity and a few other thermodynamic law things ( :) ).
To overcome gravity and those thermodynamic law things, I've hidden an infrared transceiver, an electromagnetic coil and some electronic circuitry in the base to accelerate the ball bearing up the hill. As the ball bearing reaches the low point of the track, the infrared transceiver senses the ball bearing and generates a pulse into the electromagnetic coil which accelerates the ball bearing fast enough to overcome the uphill climb. Once over the uphill climb, the ball bearing rolls down the track, crosses over the infrared transceiver again, and the process repeats.
Our six year old grandson almost figured this one out the first time he saw it, which makes us proud!
As usual, I probably forgot a file or two or who knows what else, so if you have any questions, please do not hesitate to ask as I do make plenty of mistakes.
Designed using Autodesk Fusion 360, sliced using Ultimaker Cura 4.12.1, and 3D printed in PLA on Ultimaker S5s.
Supplies
- Soldering iron and solder.
- Micromesh polishing sheets.
- Sandpaper (120, 220, 400 and 600 grit).
- Thick cyanoacrylate glue.
- Double sided tape.
- Velcro.
- 1.5MM ID heat shrink tubing.
Step 1: Parts.
I acquired the following parts:
- One 800MA 11.1VDC 50C LiPo battery.
- One JST mating connector to the JST connector on the LiPo battery.
- One Coil (Gikfun EK1909).
- One Infrared Emitter / Sensor (TCRT5000).
- One MOSFET (IRF510).
- One Diode (1N4007).
- One 1K 1/8 watt resistor.
- Two 100K 1/8 watt resistors.
- One 3300uf 50V electrolytic capacitor.
- One 2.2uf 50V electrolytic capacitor.
- One solderable perforated board (similar to a breadboard).
- One 11MM diameter ball bearing.
- One M3 by 16mm cap screw.
- Four 3MM diameter by 1MM thick neodymium magnets.
- Four 10MM diameter rubber sticky pads.
- Multi color 28AWG stranded wire.
I 3D printed the following parts at .15mm layer height, 20% infill, and no supports:
- One "Base.stl".
- One "Top.stl".
- One "Track.stl".
Step 2: Circuit Assembly.
To assemble the circuit I started by preparing the infrared emitter / sensor and coil as follows:
- Trimmed the infrared emitter / sensor (TCRT5000) leads such that when inserted into "Base.stl" there was 10MM clearance between the emitter / sensor lenses and the top of the rim.
- Soldered and insulated with heat shrink an 80MM length of yellow wire to the TCRT5000 emitter anode.
- Soldered and insulated with heat shrink an 80MM length of black wire to the TCRT5000 emitter cathode.
- Soldered and insulated with heat shrink an 80MM length of red wire to the TCRT5000 sensor collector.
- Soldered and insulated with heat shrink an 80MM length of green wire to the TCRT5000 sensor emitter.
- Soldered and insulated with heat shrink a 80MM length of red wire to one end of the coil wire.
- Soldered and insulated with heat shrink a 80MM length of black wire to the remaining end of the coil.
Next, I soldered the components to the solderable perforated circuit board similar to the breadboard layout as shown, followed by soldering the TCRT5000, coil and JST connector wires to the circuit board.
Step 3: Final Assembly and Test.
I performed the following final assembly steps:
- Sanded the ball bearing rails on "Track.stl" starting with 120 grit sandpaper, and followed with 220, 400 and 600 grit, then finely polished the rails using Micromesh 1500, 1800 and 2400 sheets.
- Pressed two magnets in "Top.stl" and the remaining two magnets in "Base.stl" such that the top magnetically attached to the base.
- Attached one rubber sticky pad to each of the bottom four corners of the base assembly.
- Positioned the TCRT5000 in the base assembly 4mm below the rim and perfectly level, the final position will be adjusted to set the sensitivity.
- Attached the coil to the base assembly using the cap screw. The position of the coil will be adjusted to set the speed of the ball bearing.
- Secured the circuit board to the base assembly using double sided tape.
- Secured the battery to the base assembly using Velcro strips.
- Glued "Track.stl" to the base assembly with four small dots of thick cyanoacrylate glue, noting the TCRT5000 must be centered in the lowest track hole.
With assembly complete and the top removed, I plugged the circuit board JST connector into the LiPo battery JST connector, placed the ball bearing at the highest point on the track and released it. When the ball bearing crosses over the TCRT5000, the circuit should pulse the coil which will pull the ball bearing and accelerate it up the track hill. The closer the coil is to the TCRT5000 the harder the ball bearing will be pulled. If the coil is too close to the TCRT5000 the ball bearing will move too fast and fly off of the track, and if the coil is too far from the TCRT5000 the ball bearing will move too slow and will not make it up the hill. I made numerous sub millimeter adjustments to the coil position in relation to the TCRT5000 until I was satisfied with the speed of the ball bearing around the track, which ended up being approximately 16mm from the center of the TCRT5000 to the center of the coil. Your distance may vary due to component tolerances.
If the coil never energizes, double check the wiring and circuit board and/or alter the position of the TCRT5000 vertically in the base assembly until it does. Also, do not use the model where an infrared source is present as that will flood the sensor rendering the model inoperative. For troubleshooting purposes, I've included a few images of oscilloscope readings at a few test points. The first oscilloscope image is of the junction of R2 and C2, the second is of the junction of R3 and C2, and the final is of the junction of D1 and Q1. I've also included images of the high, low and average current draw.
One final note, I used a LiPo battery in this model which has no low voltage detection. LiPo batteries will fail if their voltage is allowed to run too low. There are many low voltage cutoff / alarm devices that can be purchased to protect and/or warn of low voltage conditions that will fit in this enclosure, so if you wish maximize your LiPo battery protection, you may want to consider adding such a device to your model.
And that is how I 3D printed, wired, assembled and tested "Marblevator, Perpetual?, Version 2."
I hope you enjoyed it!

Participated in the
Electronics Contest


