

Introduction: Marblevator, Pick and Place, Version 2.


"Marblevator, Pick and Place, Version 2" is my second "pick and place mechanism" based Marblevator. In this model, I've replaced the magnetic marble gripper used in my previous pick and place model with a hybrid PLA / TPU gripper which, so far, has operated over 72 hours with a marble drop!
As usual, I probably forgot a file or two or who knows what else, so if you have any questions, please do not hesitate to ask as I do make plenty of mistakes.
Designed using Autodesk Fusion 360, sliced using Cura 4.12.1, and 3D printed in PLA on Ultimaker S5s.
Supplies
Soldering iron and solder.
Thick cyanoacrylate glue.
Double sided tape.
Step 1: Parts.
I acquired the following parts:
- One dual AA cell switched battery pack.
- Two AA cells.
- One N20 120RPM 6VDC gear motor.
- One 11mm diameter ball bearing.
- Six rubber stick on pads.
Unless noted otherwise, I 3D printed the following parts at .15mm layer height, 20% infill:
- One "Arm 1.stl".
- One "Arm 2.stl".
- One "Arm 3.stl".
- One "Axle, Arm 2, Gear (1m, 32t).stl".
- One "Axle, Gear (1m, 16t).stl".
- One "Axle, Gear (1m, 32t).stl".
- One "Axle, Pivot.stl".
- Four "Axle, Robot.stl".
- One "Base.stl".
- Eleven "Bolt (M8 by 1.25 by 8mm).stl".
- One "Bolt, Arm 1.stl".
- One "Bushing, Arm 1.stl".
- Three "Foot, Base.stl".
- One "Gear (1m, 16t).stl".
- One "Gear (1m, 18t).stl".
- One "Gear (1m, 32t).stl".
- One "Gear, Motor (1m, 8t).stl".
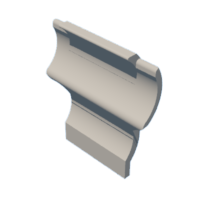
- One "Gripper, Marble, PLA.stl".
- One "Gripper, Marble, TPU.stl".
- One "Guide, Arm 3.stl".
- One "Handle, Axle, Gear (1m, 16t).stl".
- One "Mount, Motor.stl".
- One "Pivot.stl".
- One "Plate, Gear and Mount, Motor.stl".
- One "Rack.stl".
- One "Retainer, Arm 2.stl".
- One "Robot, Arm, Left.stl".
- One "Robot, Arm, Right.stl".
- One "Robot, Head, Face.stl".
- One "Robot, Head, Head.stl".
- One "Robot, Legs.stl".
- One "Robot, Torso.stl".
- One "Track, End.stl", .06mm layer height.
- One "Track, Start.stl", .06mm layer height.
- One "Track.stl".
- One "Yoke.stl".
This is a high precision print and assembly model using at times very small parts and in very tight spaces. Prior to assembly, test fit and trim, file, sand, etc. all parts as necessary for smooth movement of moving surfaces, and tight fit for non moving surfaces. Depending on you printer, your printer settings and the colors you chose, more or less trimming, filing and/or sanding may be required. Carefully file all edges that contacted the build plate to make absolutely certain that all build plate "ooze" is removed and that all edges are smooth. I used small jewelers files and plenty of patience to perform this step.
The model also uses threaded assembly thus an M8 by 1.25 tap and die will assist with thread cleaning if necessary.
Attachments
 Arm 1.stl
- Arm 2.stl
- Arm 3.stl
- Axle, Arm 2, Gear (1m, 32t).stl
- Axle, Gear (1m, 16t).stl
- Axle, Gear (1m, 32t).stl
- Axle, Pivot.stl
- Axle, Robot.stl
- Base.stl
- Bolt (M8 by 1.25 by 8mm).stl
- Bolt, Arm 1.stl
- Bushing, Arm 1.stl
- Foot, Base.stl
- Gear (1m, 16t).stl
- Gear (1m, 18t).stl
- Gear (1m, 32t).stl
- Gear, Motor (1m, 8t).stl
- Gripper, Marble, PLA.stl
- Gripper, Marble, TPU.stl
- Guide, Arm 3.stl
- Handle, Axle, Gear (1m, 16t).stl
- Mount, Motor.stl
- Pivot.stl
- Plate, Gear and Mount, Motor.stl
- Rack.stl
- Retainer, Arm 2.stl
- Robot, Arm, Left.stl
- Robot, Arm, Right.stl
- Robot, Head, Face.stl
- Robot, Head, Head.stl
- Robot, Legs.stl
- Robot, Torso.stl
- Track, End.stl
- Track, Start.stl
- Track.stl
- Yoke.stl


Step 2: Motor Mount Assembly.


To assemble the motor mount, I performed the following steps:
- After placing the AA cells in the switched battery pack and turning the switch to off, I soldered the battery pack red wire the the motor "+" terminal and the battery pack black wire to the motor "-" terminal.
- Pressed "Gear, Motor (1m, 8t).stl" onto the motor shaft.
- Pressed the motor into "Mount, Motor.stl".
Step 3: Base Assembly.


To assemble the base, I performed the following steps:
- Glued "Robot, Legs.stl" to "Base.stl" onto the leg platform such that the toes were flush with the free edge of the leg platform and the right leg was 12mm from the rear of the base.
- Pressed two rubber stick on pads onto each of the three "Foot, Base.stl".
- Pressed the three foot assemblies onto the base legs.
- After polishing the leading edges (the two edges that come in contact with the gripper) of "Track, Start.stl", I glued it to the start of the track.
- Glued "Track, End.stl" to the end of the track.
- Attached the track assembly to the base assembly using five "Bolt (M8 by 1.25 by 8mm).stl".
- Attached "Plate, Gear and Mount, Motor.stl" to the rear of the base assembly using two "Bolt (M8 by 1.25 by 8mm).stl".
- After gluing "Rack.stl" to "Yoke.stl", I positioned the tower on "Arm 2.stl" into the yoke slot, slid the two pieces into the dovetail slots in the base assembly, centered the hole in the arm over the hole in the base, then pressed "Axle, Arm 2, Gear (1m, 32t).stl" into the hole in the arm (a small dot of glue may be required to secure the arm to the axle).
- Made certain the mechanism rotated with ease.
- Applied double sided sticky tape to the base, then attached the battery pack.
- Attached the motor mount assembly to the gear and motor plate using two "Bolt (M8 by 1.25 by 8mm).stl".
- Positioned "Gear (1m 32t).stl" over the threaded hole on the gear and motor plate assembly then secured in place with "Axle, Gear (1m, 32t).
- Positioned "Gear (1m, 16t) over the remaining hole on the gear and motor plate assembly then secured in place with "Axle, Gear (1m, 16t).
- Made certain the mechanism rotated with ease.
Step 4: Guide Assembly.


To assemble the guide, I performed the following steps:
- Slid "Pivot.stl" onto "Arm 3.stl" making certain the threads were on the same side.
- After pressing "Gripper, Marble, TPU.stl" into the slot in "Gripper, Marble, PLA.stl", I glued the two together with small dots of glue, the pressed the gripper assembly onto the arm assembly in the orientation shown with the arm being flush with the inside surface of the PLA portion of the gripper (the position will be fine turned later).
- Slid "Arm 1.stl" into the center hole of "Guide, Arm 3.stl".
- Pressed "Bushing, Arm 1.stl" onto arm 1.
- Pressed "Gear (1m, 18t).stl" onto arm 1 then secured in place with "Bolt, Arm 1.stl".
- Slid the threaded portion of arm 3 into the hole in arm 1, and the pivot into the hole in the guide.
- Secured arm 3 to arm 1 using "Retainer, Arm 3.stl".
- Secured the pivot to the guide using "Axle, Pivot.stl".
- Made certain the mechanism operated with ease.
- Rotated the motor until the yoke was at its furthest right travel, positioned the guide assembly over the base assembly, slid the 18 tooth gear on the guide assembly into the rack such that arm 1 was in the position shown, the secured the guide assembly to the base assembly using two "Bolt (M8 by 1.25 by 8mm).stl".
Step 5: Final Assembly and Alignment.


For final assembly, I performed the following steps:
- Slid "Handle, Axle, Gear (1m, 16t).stl" first through "Robot, Arm, Left.stl", then through "Robot, Arm, Right.stl", then pressed the handle into the hole in the gear 1m, 16t axle.
- Glued the "Robot, Head, Face.stl" pieces to "Robot, Head, Head.stl", then glued the head assembly to "Robot, Torso.stl" at a 45 degree angle.
- Secured the robot head and torso assembly to the robot legs using two "Axle, Robot.stl".
- Secured the robot arms to the head and torso assembly using two "Axle, Robot.stl".
With assembly complete, I rotated the mechanism until the gripper was closest to the third track segment, then adjusted the gripper lengthwise on the arm shaft just enough to clear the track (about 1mm). I then rotated the mechanism until the gripper just entered the track start and adjusted the gripper such that it was centered in track start.
And that is how I 3D printed and assembled "Marblevator, Pick and Place, Version 3".
I hope you enjoyed it!


