Introduction: Marblevator, Spirals.


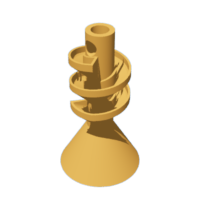
"Marblevator, Spirals" is a two revolution downward spiraling Marblevator incorporating what I refer to as an "inverse auger" design.
In traditional "Archimedes Screw" styled marble lifts (I refer to the "screw" here as an "auger"), the auger is in the center and rotates while the guide rails are external and stationary. In this model, the guides are in the center and rotate while the auger is external and stationary and holds the spiraled track.
Designing the model in this manner provides easier 3D printing without the need for supports. However, I also designed the track so that it would "over rotate" the marbles to slow their descent. The model uses 8mm ball bearings for marbles, and the track rails are 7.9mm wide, so the ball bearing rides down the track rails and not the track bottom, which over rotates the ball bearings thus providing a slower descent. So with dimensions this tight I used the "Engineering Profile" in Cura 4.1.0 for accurate 3D printed parts the model requires.
Designed using Autodesk Fusion 360, sliced using Ultimaker Cura 4.1.0, and 3D printed in PLA on Ultimaker S5s.
Supplies
- Thick cyanoacrylate glue to lightly secure the motor and "Cap.stl" to "Track.stl".
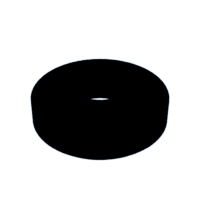
- 8mm ball bearings.
- 3VDC power source.
- 100RPM 6VDC N20 gear motor.
- Wire.
- Soldering iron and solder.
Step 1: Assembly and Operation.


I 3D printed all parts at .15mm layer height, 20% infill, and no supports. I performed my usual sanding, filling, etc. process as in my previous projects to remove excess PLA as required.
The video shows assembly and operating instructions as well, but to assemble the model, I performed the following steps:
- Soldered red and black wires to the gear motor.
- Pressed the gear motor into "Track.stl", noting a small dot of cyanoacrylate glue may be required to retain the motor.
- Routed the wires out the side of the track assembly.
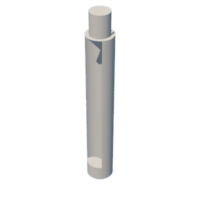
- Inserted "Barrel.stl" into the track assembly, then pressed it onto the motor shaft, noting the position of the motor shaft and barrel flats.
- Pressed "Cap.stl" onto the track assembly, noting a small dot of cyanoacrylate glue may be required to retain the cap.
Once assembly was complete, I attached a 3VDC power source to the model making sure the barrel rotated counter clockwise as viewed from the top of the model, then added the ball bearings.
And that is how I 3D printed and assembled "Marblevator, Spirals".
I hope you enjoyed it!