

Introduction: Marblevator, Wave


One of my first 3D printed designs was “Mechanical Pseudo Sin Wave” (https://youtu.be/S2xk1iAFwcM). Published in 2013, that model utilized a 3D printed chassis, along with 3D printed crank, cams and lifters, to mechanically simulate a sin wave. Combining the principles of that design with my fondness for marble machines resulted in the latest addition to my Marblevator series, “Marblevator, Wave”.
In this model, the cams, lifters and track segments move in a pseudo sin wave motion, carrying a “marble” (ball bearing) from the end of the track to the start in the trough of a "wave". I designed the model to use 8mm ball bearings, but as can be seen in the video with careful adjustment 11mm ball bearing may be used as well (I will publish a track with lower sidewalls better suited for both 8 and 11mm ball bearings soon).
Designed using Autodesk Fusion 360, sliced using Ultimaker Cura 14.12.1, and 3D printed in PLA on Ultimaker S5s.
Supplies
Solder.
Soldering Iron.
Step 1: Parts.
I acquired the following parts:
- One N20 style 6VDC 120RPM gear motor.
- One twin AA battery case with wires and switch.
- Two AA Batteries.
- Three 8MM ball bearings.
I 3D printed all parts at .15mm layer height and 20% infill. I 3D printed twelve each of "Cam.stl", "Lifter.stl" and "Track, Segment.stl", four each of "Bolt, Track, Guide, Lifters.stl", and one each of the remaining parts.
This is a precision print and assembly model. Prior to assembly, test fit and trim, file, sand, etc. all parts as necessary for smooth movement of moving surfaces, and tight fit for non moving surfaces. Depending on you printer, your printer settings and the colors you chose, more or less trimming, filing and/or sanding may be required. Carefully file all edges that contacted the build plate to make absolutely certain that all build plate "ooze" is removed and that all edges are smooth. I used small jewelers files and plenty of patience to perform this step.
The model also uses threaded assembly, so I used a tap and die set (8mm by 1) for thread cleaning.
Attachments


Step 2: Base Assembly.


To assemble the base, I performed the following steps:
- Soldered the battery case to the motor such that when the motor is powered, the motor shaft rotated counter clockwise when viewed from the motor shaft end of the motor.
- Positioned "Gear, Motor.stl" in "Base.stl".
- Pressed the gear motor into the motor holder until the motor shaft passed through the hole in the motor gear.
- Positioned "Camshaft.stl" into the base assembly.
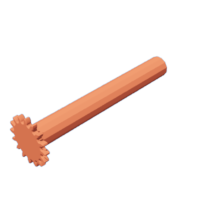
- Slid one "Cam.stl" onto the camshaft.
- Slid the remaining eleven cams onto the camshaft, each rotated thirty degrees from the previous cam (the camshaft has a twelve sided polygon to assist in cam alignment).
- Slid "Bushing, Camshaft.stl" onto the camshaft assembly.
- Secured the camshaft bushing in place with "Bolt, Bushing, Camshaft.stl".
- Slid the motor such that the motor gear disengaged from the camshaft.
- Made certain the camshaft assembly rotated with ease.
- Slid the motor back into position.
Step 3: Top Assembly.


To assemble the top, I performed the following steps.
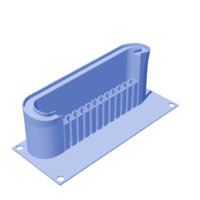
- Slid one "Lifter.stl" into "Track, Guide, Lifters.stl".
- Pressed on "Track, Segment.stl" onto the lifter.
- Repeated the previous two steps for the remaining eleven lifters and track segments.
Step 4: Final Assembly.


For final assembly, I performed the following steps:
- Positioned the top assembly over the base assembly.
- Secured the top assembly to the base assembly using four "Bolt, Track, Guide, Lifters.stl".
Finally, I installed the AA batteries in the battery case, slid the battery case switch to the on position, added the three ball bearings, then sat back and and watched it run.
And that is how I 3D printed and assembled "Marblevator, Wave".
I hope you enjoy it!

Participated in the
Toys and Games Contest


