

Introduction: Simple Lego Tray / Legos Organizer / Storage From Scrap Wood DIY


Legos Scattered On The Floor? No More!
If you have kids, most likely, you have also...a lot of Lego parts scattered on the floor...
In our home, it happens in the kids room, but specially in the living room. The kids like to bring their Legos and play there. The problem, is that these small parts are traveling everywhere.
So, I decided to end this... or at least try to minimize it :)
I built a very Legos tray / organizer, from some scrap wood I had from previous projects (and I actually planned to throw away). This project is very quick and simple to make.
Now, the kids can easily transfer their Legos bulk from one room to another, and also store it under the bed or sofa.
You're welcome to visit my YouTube Channel, subscribe, and also watch my additional projects. Don't forget to click the 'bell' button in order to get new videos notification.
Thank you! :)
Supplies
General List of tools I'm using - https://www.itzikdiy.com/tools-list?m=1
Tools in this Instructable:
- Miter saw or other saw cutting angles.
- Electric nail / staple gun.
- Measuring tape.
Materials:
- 4mm plywood board, covered with formica.
- 4cm * 17mm strips of particle board / chipboard.
- Glue.
- Wood filler
Step 1: Before


This is almost a usual look of the floor in our living room.
It starts with a bulk of Legos in one place and later everything is scattered all over the floor ...
Step 2: The Plywood


This instructable started after I saw this plywood board laying in my storage, and thought it's can be good for such project.
This is 4mm plywood board, covered with formica (From our old kitchen).
If you wonder what is this gold color... it's from this special Instructable :)
This board will be used for the bottom of the tray.
Step 3: Measuring the Tray Size


I measured the size of the plywood board, so I can know the size of the strips I need to cut for the frame.
The size is 64cm * 55cm, but of course you can do your own required size.
Actually, bigger is better, but you should think of the storage of it, mobility in narrow places when it's full with Legos, and also the kids who needs to be able to carry it.
Step 4: Cutting the Frame


I had some long scraps of particle board / chipboard strips, which were leftovers from big boards, and I almost throw away. The strips were coved with Melamine.
These were perfect for making the frame, due to their width (~4cm) and also the white color, matching my plywood board, so, no paint is required!
I cut 2 pieces of 64cm, ending in 45 degrees, using my miter saw, and 2 pieces of 55cm.
Step 5: Cutting the Inner Separators

I decided to make some separators inside the tray frame, from the remaining pieces of the particle board strips.
I cut them in 90 degrees.
Step 6: Gluing the Frame


I started by gluing the frame.
I didn't use wood glue, since it's not a bare wood, but a smooth surface of formica / melamine, so I thought that super 7 glue will be good for this job.
Step 7: Connecting the Frame


After gluing, I connected each strip of the frame from the bottom of the plywood board, using a Staple/Nail Gun, every few centimeters.
Step 8:


Step 9: Measuring the Frame Separators Position


I marked the position of the inner vertical separator, in the middle of the frame, and the horizontal separator will be connected to it.
You can decide to make more separators according to your needs... I was limited with the remaining pieces of the particle board strips I had.
Step 10: Gluing the Separators


I put glue in the vertical and horizontal separators.
Step 11: Switching to Nails

I removed the staples from the gun, and put 3cm nails instead.
Step 12: Connecting the Separators With Nails


I connected the outer frame to the inner separator strips, with nails.
Step 13: Marking the Separators Position

I marked the position of the inner separator strips position, so I can connect them using the staple gun in straight line.
Step 14: Connecting the Separators With Staples


Finally, I connected the separator strips, from the bottom of the plywood board, using a Staple/Nail Gun, every few centimeters, like I did with the frame.
Step 15: Filling Holes

I filled the holes of the nails, and also a lot of holes which were initially in the strips, using a white wood filler.
After drying, I sanded the wood filler leftovers.
Step 16: Done!


The Tray / organizer is done... Simple as you can see.
Step 17: Side Look - Plywood Board


Step 18: Kids Time

I'm done... It's the kids time to pick everything from the floor, into the new tray.
Step 19: After


The floor looks better now, isn't it? :)
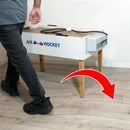
Step 20: Take It Out From Under the Sofa


Meantime, we put the tray under the sofa, so the kids can take it out and play on the living room's table, and later put it back.
Step 21: Lifting


Step 22: Playing


Step 23: Putting Back Under the Sofa

Step 24: Video
That's it... what do you think about this solution? Let me know if you have suggestions for improvements, in the comments.
You can watched the video for the full process described in this instructable.
You're welcome to visit my YouTube Channel, subscribe, and also watch my additional projects. Don't forget to click the 'bell' button in order to get new videos notification.
Thank you! :)

Participated in the
Plywood Challenge


