

Introduction: Simple & Sturdy Workbench


For this workbench build, I wanted something that would be both sturdy and simple to construct. This workbench can be built for less than $100, is a rigid design and has a shelf for extra storage. Add on a pegboard back even more space. You can see more information on this project and others at http://jeffsdiy.com/workbench/ .
(Clicking the links below and purchasing anything on amazon helps support JDIY, and it doesn't cost you anything extra!)
Tools needed
Circular saw or table saw
Miter saw or table saw
Jigsaw or bandsaw
Lumber & materials:
One sheet of plywood - I used 3/4" Maple.
(2) 4x4's - 8 foot length boards - these will be the four legs
(6) 2x4's - 8 foot length boards
1.5" screws to secure the plywood, drywall screws work here
3.5" screws to attach everything else
Step 1: Cut the Workbench Legs and Supports


To speed up the project, I used a miter saw & table and clamped down a scrap board to make a fence. This way, all the cuts can be made quickly and exactly the same length. Since I can't fit a full sheet of plywood in my car, I had them rip it into two panels, each 2 feet wide by 8 feet long. I decided to go with a 6 foot length for the workbench, 24" width and a 34" total height so that it would match my other woodworking bench.
Tip: This bench would make a great extension for a table saw, so for extra versatility, consider building it to the same height as your machine. Remember to add in the thickness of your plywood when determining how tall the legs should be.
Cut list:
(4) 4x4 legs 33 1/4" length (To bring my table top to 34" using 3/4" plywood)
(4) 2x4 front and back supports, 6' length
(8) 2x4 cross supports (4) and stretchers (4), all at 21" lengths
Step 2: Assemble the Workbench Top


I pre-drilled all screws using the flip drive drill bit, it saved a ton of time. Pre-drilling will ensure that your boards don't split. I used 3.5" decking screws when attaching everything except the plywood, where I used 1.5" drywall screws. I started by assembling the top of the workbench first. This is much easier if you have a somewhat flat basement floor. Unfortunately, I don't have that, so I had to use a combination of my existing workbench and some scrap plywood as flat surfaces. Use clamps to hold pieces in place while you screw them together.
First, attach one of the 21" long 2x4's to the top of each pair of your 4x4's.
Step 3: Assemble the Bottom Shelf


Flip the workbench so that it is standing up. Then, using the same
process as in part two, add another pair of 6' boards and 21" boards to the bottom part of your 4x4's. It is up to you as to how high off the ground the shelf will be. I chose 8" so that I would have plenty of space for storage and so that my feet won't bump into them while working when the bench is finished. Use your clamps to help keep the boards in place while you drill them.
Tip: Speed up this step by cutting spacers out of scraps from your 2x4's that are as long as you'd like your shelf to be off the ground. This both holds your boards at the right height and keeps them level.
Step 4: Attach the Stretchers

Attach two of the 21" 2x4's as stretchers and place them roughly 2 feet apart. This will help to keep the top boards from bowing.
Tip: Always use gravity to your advantage. Flip the workbench on its side when screwing in the long boards and stretchers, it makes drilling much easier!
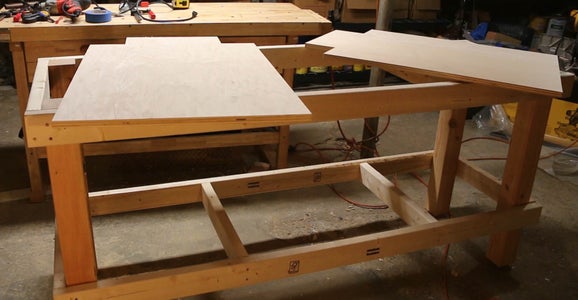
Step 5: Cut Plywood to Size & Mark Notches


I had the plywood ripped to 24" widths at the store. Since both the plywood top and shelf will be the same size, 24" wide by 6' long, stack both on top of each other and clamp down a scrap piece of plywood to act as a fence for your circular saw. Cut both pieces plywood down to 6' in length. Since the bottom shelf is too big to slide into place as a solid piece, I cross cut it with the circular saw, using the same procedure, into two, three foot long sections.
Tip: Put masking tape over plywood edges to be cut with a circular or table saw, it reduces splintering and makes for smoother cuts.
Step 6: Cut Notches and Attach Shelf and the Table Top


Next, measure and mark out slots to be cut on each corner of the shelf that so that it can fit into place against the 4x4's, they measured about 5" square. Cut them out on a bandsaw or a jigsaw. Check for fit and trim off excess as needed. Then screw in the shelf pieces and table top using the 1.5" drywall screws.
Step 7: Stain, Finish & Add Optional Pegboard Back


That's it! Check the table for movement and add additional screws if some areas show wobble. With just two screws on each joint and only putting screws around the perimeter of the top and bottom, my workbench was solid as a rock! Finish the workbench with some polyurethane for added durability and stain if you'd prefer. You can also easily attach pegboard using 2x4 scraps to the back of the bench for added storage. I used some shoelaces to hang up all my hand planes, it makes them really easy to access!

Participated in the
Plywood Contest


