

Introduction: T-Display-S3 NTP Clock


"T-Display-S3 NTP Clock" is a program I wrote in the Arduino environment in order for me to become familiar with the "LilyGO T-Display S3" single board computer. The computer has an onboard 320 by 170 pixel color LCD display, along with WiFi, BLE, USB, LiPo battery charging and a number of other features I plan to use in upcoming designs.
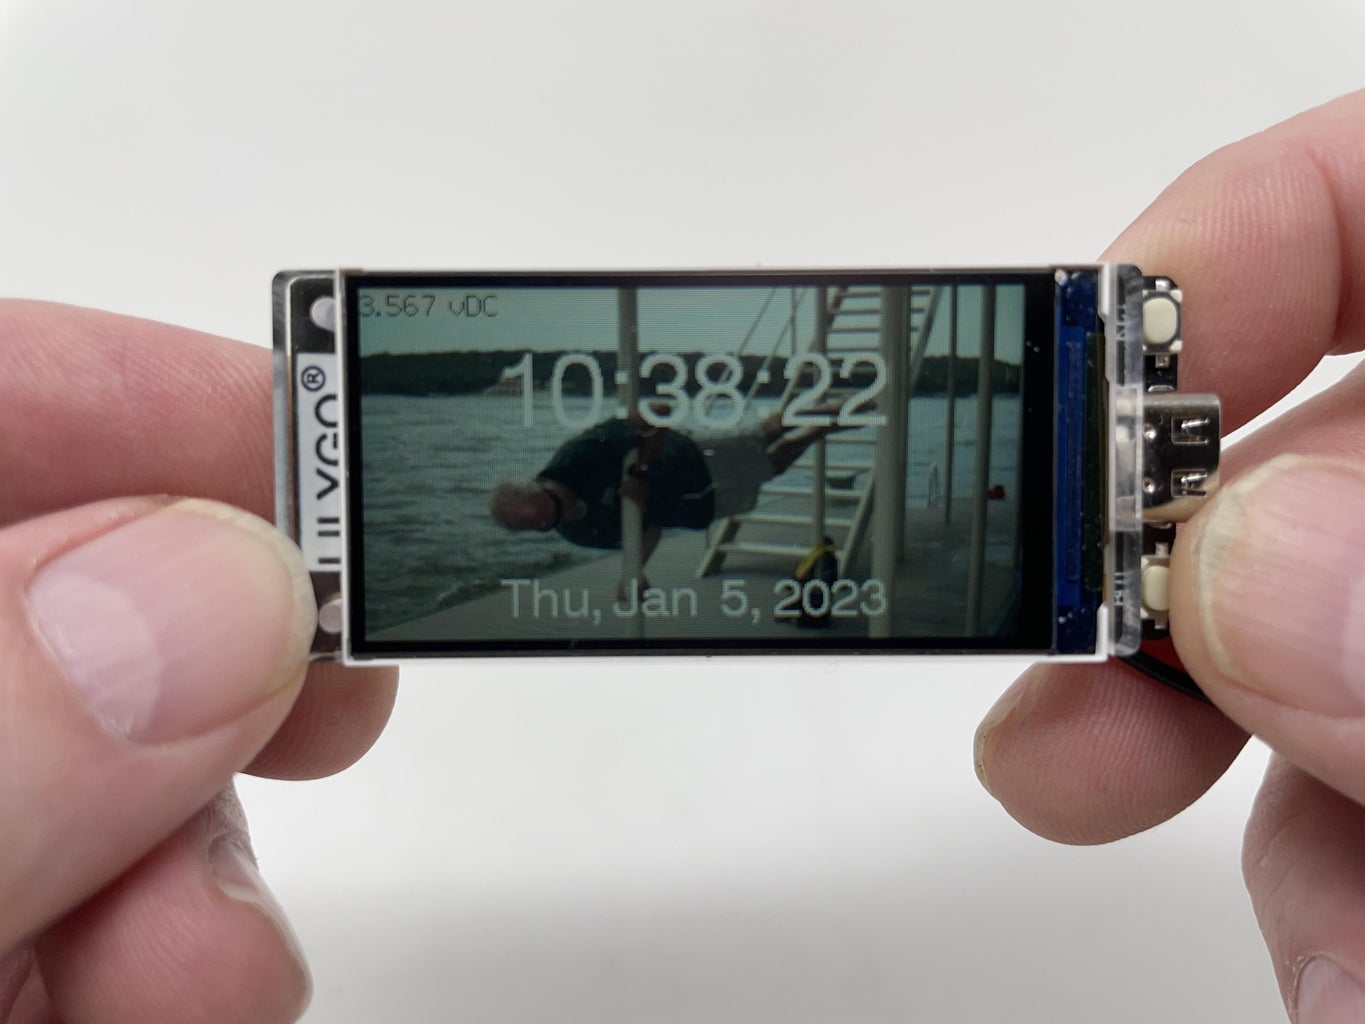
Unfortunately there is very little documentation available for this board so it can be a bit confusing to locate ports, features and such. The manufacturer did recommend the use of "TFT_eSPI" graphics library which supports the use of "sprites". I decided to use sprites for the background, time, date and battery voltage graphics in order to avoid screen flickering / flashing during refresh. The main sprite (background sprite) is the same size as the LCD display (320 by 170 pixels). The remaining sprites, date, time and battery, are just large enough to hold the date, time and battery voltage text.
To update the date, time, battery voltage and LCD brightness graphics, the software begins by copying the image "Greg_on_a_pole_small" (located in the included file "Greg on pole small.h") to the background sprite which erases all previous date, time, battery voltage and LCD brightness graphics. Next, the time sprite is filled with the updated time text, then copied to its position on the background sprite using transparency so that only the text is written on the background sprite. The same process occurs for the date and battery sprites. Finally, the LCD brightness graphic is simply drawn as a rectangle on the background sprite. With all drawing completed, the background sprite is then transferred to the LCD, after which a short delay is encountered, and the entire process repeats itself.
For date and time the software uses WiFi to contact and NTP time server. You will need to alter the two variables, "chSSID and "chPassword" to allow the software to communicate through your router to the time server.
Step 1: Software.

For the background image, I selected an image from my iPhone and loaded it into the "Preview" program on my iMac. In Preview, I selected "Tools, Adjust Size..." then set the image size to 320 by 170 pixels (the same size as the T-Display-S3 LCD). I then sent the image to one of the numerous image format conversion tools on the web (I used this one: http://www.rinkydinkelectronics.com/t_imageconverter565.php), converted the image to an array, then downloaded the image to a file I named "Greg on pole small.h".
To setup Arduino for the T-Display-S3 board, I followed the instructions here: https://github.com/Xinyuan-LilyGO/T-Display-S3. With all necessary libraries installed (see the "Included files." section in "T_Display_S3_Clock.ino" for the required libraries), I adjusted my Arduino "Tools" settings as shown in the attached screen capture, created a new sketch named "T_Display_S3_Clock", then copied the background image file "Greg on pole small.h" into the T_Display_S3_Clock sketch folder.
Finally, I wrote the code "T_Display_S3_Clock.ino", compiled and downloaded it to the T-Display-S3 board via USB, and my first T-Display-S3 program was a success!
Hopefully I've provided sufficient comments in the software to explain how it works and if not, feel free to comment and I will do my best to explain.
I hope you enjoyed it!


![Tim's Mechanical Spider Leg [LU9685-20CU]](https://content.instructables.com/FFB/5R4I/LVKZ6G6R/FFB5R4ILVKZ6G6R.png?auto=webp&crop=1.2%3A1&frame=1&width=306)


