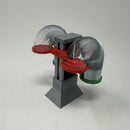
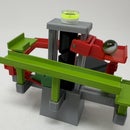
Introduction: The "Nuts and Bolts" of How I Design, 3D Print and Prepare Nuts and Bolts.
For those who have followed my 3D printing Instructables, you've noticed I use threaded assembly quite frequently in my mechanical designs along with a tap and die set for thread cleaning.
The female threads in my designs are almost always imbedded within a 3D printed component surface, for example on the build plate side, a build plate perpendicular side, or a build plate parallel side of the component, and almost always require minor thread cleaning using an appropriate tap size for removal of build plate "ooze" or overhangs.
The male threads in my designs are almost always printed as either a bolt or an axle, and are almost always printed perpendicular to the build plate side. With careful adjustment of the slicer flow settings, these components can be 3D printed with minimal clean up (using a die) or no cleanup at all.
This Instructable links to a video showing the steps I took to design, 3D print clean and assemble a simple 6mm by 1 threaded nut and bolt. I've also included the files "Bolt.stl" and "Nut.stl" used to create the 3D printed components starring in the video, as well as the Autodesk Fusion 360 file "6mm by 1 Bolt and Nut v1.f3d" showing how I designed these components.
I printed both components at a reduced flow rate (70% in the case of the printer and colors I used). This is to avoid over extruding the parts which in turn requires more cleanup. The printer and colors you use will more than likely require a different flow rate, and these two small components can assist in determining the flow rates that achieve the best results by printing, cleaning then testing for fit, and if necessary, adjust the flow rate and repeat. Once the ideal flow rate is determined for the printer and colors I used, I note the printer and colors in my "notebook of 3D printing tips" so I don't forget.
As usual, I probably forgot something, so if you have any questions, please do not hesitate to ask as I do make plenty of mistakes.
Designed using Autodesk Fusion 360, sliced using Cura 4.3.0, and printed in PLA on an Ultimaker S5.
One final note, I receive no compensation in any form whatsoever for the design, design tools, materials, tools and/or supplies used in this project.


