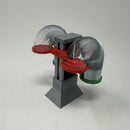
Introduction: A Message From the Heart
For my valentine.
Pull the heart handle to view the message, let go and it retracts back into the heart.
Requires 3/8" (9.525 mm) ribbon. In addition, my wife printed text on ink jet compatible heat transfer (iron on) paper to make the various messages, then ironed them onto the ribbon.
Step 1: Printing
I printed my Valentine Heart Message on an Ultimaker 3 Extended at .1mm vertical resolution. The parts "Back.stl" and "Spring.stl" were printed with 100% infill, the remaining parts at 20% infill.
Step 2: Ribbon
I purchased 3/8" white ribbon and heat transfer (iron on) paper. My wife designed the messages, printed them in reverse on the heat transfer paper, then ironed them onto a 126mm length of ribbon.
I glued one end of the ribbon onto "Handle.stl", then wrapped the ribbon one time through the slot in "Handle.stl".
I glued the remaining end onto "Spool.stl" at approximate 7:00 to 8:00 o'clock position. Note the spring mounting hole in "Spool.stl" is at approximately 9:00 o'clock position.
Step 3: Assembly
With the ribbon glued onto "Handle.stl" and "Spool.stl", position "Spring.stl" into "Spool.stl" then press the hexagonal pin on "Spring.stl" into the hexagonal hole inside "Back Enclosed.stl". Note the position of the spring in the assembly photograph. Make sure that "Spring.stl" is fully seated in "Back Enclosed.stl", and that "Spool.stl" rotates freely.
Route the ribbon around the outside of the spool assembly, then between the pins of "Back Enclosed.stl" and out the bottom.
Finally, carefully press "Front.stl" onto "Back Enclosed.stl".


