

Introduction: Battery-Powered Digital Picture Frame Using Pimoroni Inky Frame


The Pimoroni Inky Frame is a 5.7 inch 600x448 colour E-ink display with a Pi Pico W microcontroller designed for efficient operation on battery power. A real-time clock (RTC) chip enables a low-power deep sleep mode. The device can wake up due to a button press, a timer or an external 3.3v trigger voltage.
This article shows how to use the Inky Frame as a battery-powered, standalone digital picture frame capable of showing thousands of JPEG images from a micro SD card. The software is a simple MicroPython program which cycles through the images on a timer. The Inky Frame's buttons can be used to manually advance through the images.
This article includes a power study of the Inky Frame using a Nordic Power Profiler Kit II to check the deep sleep mode and the power required to update the display with a new image.
The seven colour E-ink display is remarkable but the penalty for multi-pigment particles is a slow update process. The display takes 30 seconds to update which limits the applications the Inky Frame is suitable for.
The Inky Frame with some personalised images makes for a great gift and one that might inspire exploration of Pimoroni's example programs and MicroPython programming.
The images used for this article are:
- A testcard image loosely modelled on the BBC Test card F.
- Lenna - an image frequently used as an example for image processing.
- Tim Jenison and his painting of The Music Lesson by Johannes Vermeer accompanied by Penn and Teller, Denver's 9news photograph.
- Dan Kitchener's Midnight Drive.
- Eleanor Tomlinson's Jubilee Ma'amalade Tea.
- University of Montreal's Tony de Peltrie.
- My Dog Sigh's Ukrainian Eye Reflection.
- JMW Turner's The Fighting Temeraire.
- Ian Sheldon's Big Evening Storm Clouds.
These are presented as photographs of the Inky Frame alongside the originals.
UPDATE: The Inky Frame now comes in three sizes: 4", 5.7" and 7.3" - see Pimoroni Inky Frame Comparison - 4 Inch Vs 5.7 Inch for more detail on the smaller one.
Supplies
- Pimoroni Inky Frame - comes with small metal rods to make the Inky Frame stand up on a desk. For battery power it needs either a 3xAA /3xAAA battery pack or LiPo battery (Inky Frame does not have an on-board charger).
- 3D printer - if you want to make a frame for the Inky Frame (optional).
Step 1: Installing Pimoroni MicroPython on Inky Frame

The Pimoroni Getting Started with Inky Frame guide has a full description of how to install MicroPython on the Inky Frame. The abbreviated steps are below.
- Plug the Inky Frame into a computer using a (non-charge-only) USB cable.
- Hold down the BOOTSEL button on the Pi Pico W board on the reverse side of the Inky Frame and press the Reset button button. An RPI-RP2 drive will appear.
- Download the latest uf2 file for the Pimoroni version of MicroPython and copy it onto the RPI-RP2 drive, e.g. pimoroni-picow_inky_frame-v1.19.15-micropython.uf2 - Inky Frame specific versions (1.19.11 onwards) may hide under the Show all N assets link.
The Pimoroni 1.19.6 and 1.19.10 versions were used for this article.
Step 2: Installing Slide Show Program


If you are not familiar with MicroPython on Pimoroni products then it's worth taking a look at the Pimoroni: Getting Started with Inky Frame guide.
- Install the Thonny editor.
- Setup Thonny for the Pi Pico W.
- Under Tools > Options... menu there is an interpreter tab where MicroPython (Raspberry Pi Pico) needs to be selected. Thonny doesn't distinguish between Pi Pico and Pi Pico W.
- Ensure Thonny can connect to the MicroPython interpreter on the Pi Pico W. Clicking on the STOP icon should show the interpreter's REPL mode in the Shell at the bottom.
- Download the files from GitHub:
- Click on the Download button on sdcard.mpy to download the file to your computer.
- Click on the Raw button on sdslideshow.py and use Save as in the browser to download the file to your computer.
- In Thonny
- on the Raspberry Pi Pico pane, the lower part of the Files pane (this has been hidden for screenshots above), select New directory... to create
- an sd directory (mount point for the micro SD card file system) and
- a lib directory.
- Load sdslideshow.py files into Thonny and use Save as to save it to the Raspberry Pi Pico - the file can be renamed to main.py as part of the Save as operation to make it run when the Pico is turned on. The screenshots above show this selection box and saving that file to the Pi Pico.
- Open the lib directory on the Raspberry Pi Pico pane. On the This computer pane above open the directory where sdcard.mpy was downloaded to and right click on that file and select Upload to /lib.
- On the tab now titled main.py, press the green start icon to start the program.
The MicroPython interpreter runs the main.py file at start-up. CircuitPython can confuse here as it also looks for code.py.
Another description of how to use Thonny to copy mpy files to the lib directory on a Pi Pico can be found in Adafruit Learn: CircuitPython Libraries on MicroPython using the Raspberry Pi Pico.
The (free to download) book: Get Started with MicroPython on Raspberry Pi Pico may also be of interest.
Step 3: Preparing Images


The MicroPython JPEG library works best with images that match the resolution of the device, 600x448 pixels. The images need to be non-progressive JPEGs.
The screenshots above show a 512x512 image being both cropped and letter-boxed with black borders in GIMP to produce an image with the correct ratio. It's then exported as a non-progressive JPEG file.
Increasing the colour saturation may improve the look of certain images on the Inky Frame - in GIMP this be adjust using Colors > Hue-Saturation.
The images files should be placed in a slides directory on the micro SD card. The order the files are copied into the slides directory determines the order the slide show program shows them in. This is probably not documented behaviour so could change in the future!
An introduction.jpg file in the root (top-level) directory is required for the instructions on the introduction screen.
Step 4: 3D Printing Optional Frame

Ingurum has created an attractive two-part, 3D printed frame with enough space for a flat LiPo battery designed to allow the Inky Frame to be mounted on a wall. This is discussed in Pimoroni Forums: Inky Frame slide show.
Step 5: Power Profiling Inky Frame I
The video above shows the Inky Frame connected and being powered by the Nordic Power Profiler II using the battery connector.
- 00:09 Start of logging, initial current surge as Inky Frame is powered which then falls to 33.94uA, the deep sleep current level.
- 00:26 Button B pressed waking up Inky Frame, another current surge as Pi Pico W powers up then MicroPython interpreter starts up and runs the slide show program which reads the next file from micro SD card, decodes it and dithers it.
- 00:31 Start of E-ink display update with average current of approximately 50mA.
- 01:01 End of E-ink display update.
- 01:11 Back to deep sleep, 33.91uA.
The voltage is set to 4.5V to match typical output from fairly new alkaline AA batteries. The total charge is logged as 1.74 coulombs. A 2000mAh battery is equivalent to 7200 coloumbs.
Step 6: Power Profiling Inky Frame II


The screenshots above show the data from the previous video:
- complete period of time where the Pi Pico W is powered and
- the Inky Frame going back to deep sleep mode where only the RTC chip is left powered.
Some later testing (not shown) proved the Inky Frame works on 3.3V. The total charge was slightly higher for an image update, 2.33C and 2.15C from two updates. The deep sleep current was lower at 24.84uA.
For a fresh set of batteries with a capacity of 2000 mAh (down to 1.1V) and at 2C per image the Inky Frame could show 7200C / 2C = 3600 images on one set of batteries. In continuous deep sleep at 30uA the life time is many years, 2000mAh / 0.030mA / 24 / 365.25 = 7.6 years.
Powerstream have some interesting tests of AA batteries at various (constant) discharge currents.
Step 7: Notes on the Inky Frame


The image above renders well. There's some detail lost in the faces from dithering but the painting looks very convincing. The plastic screen protection has been left on for all of the photographs of the Inky Frame in this article.
Some other aspects of the Inky Frame worth noting are listed below.
- The viewing angle is very good.
- The E-ink display is made from thin glass making it fragile.
- Only certain micro SD cards work. Quoting Pimoroni: "We've found Pico flavoured C++/MicroPython is quite fussy about SD cards so if yours doesn't work, try another or formatting using FAT".
- There are only seven colours and dithering is used to render full colour images. Some images look better than others, examples are scattered through this article.
- There is no LiPo charger.
- The Inky Frame can work from lower voltages. There doesn't appear to be a specified lowest voltage but 3.3V works ok. The Inky Frame has a maximum voltage of 5.5V which means a 4xAA cannot be used with alkaline (1.5V) batteries.
- Turning on battery power to the Inky Frame does not wake it from deep sleep.
- The five buttons on the front do not respond to a quick press in deep sleep mode.
- There isn't much memory left over in MicroPython mainly due to the 107520 bytes required for the screen.
- The sensitivity of the Pi Pico W's wireless antenna is not as good as many other devices, e.g. a smartphone. If you want to extend the slide show program to download files over Wi-Fi it's worth checking the viability of Wi-Fi first in your chosen location.
- The Inky Frame display, like its cousin the Inky Impression, works best at room temperature.
Step 8: Colour Rendering


This is a basic test card without the refinements of one from a standards organisation like SMPTE. The first image shows the original 600x448 scaled up three times without interpolation and the photograph of the Inky Frame approximately aligned and presented next to two sections of the original. The dithering for the magenta section doesn't work well close-up but is more convincing from a distance. The cyan looks peculiar and is either the result of the absence of suitable particles with useful pigment colours or a bug/deficiency in the dithering algorithm. For the primary colours the red and the green are good, the blue has a purple quality to it.
Step 9: Image Suitability - Blues
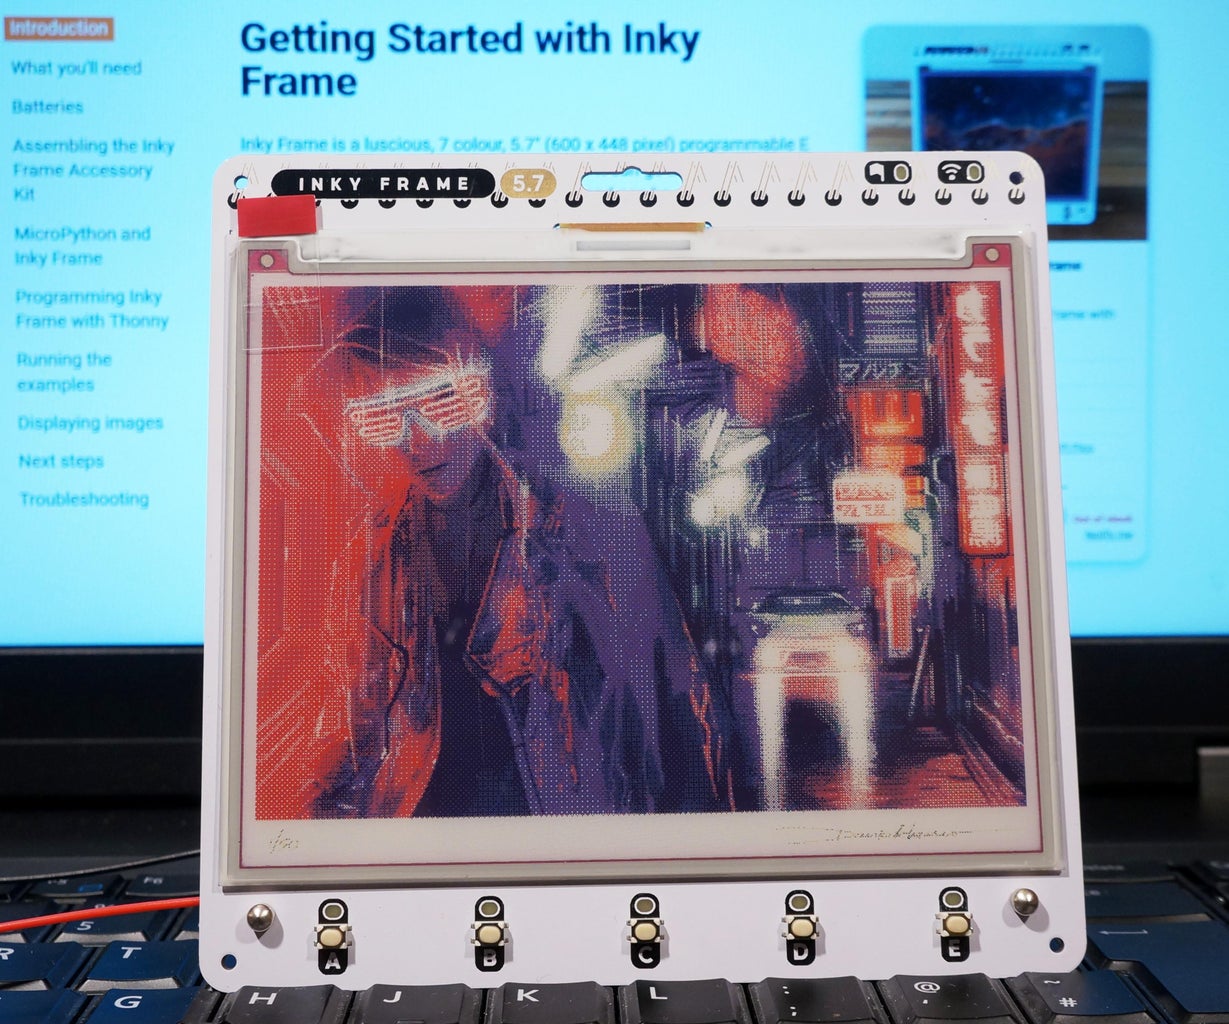

This is a challenging image to reproduce. The Inky Frame blues and purples seem to get a bit lost but the detail is rendered surprisingly well.
Step 10: Image Suitability - Colour Saturation


The Fighting Temeraire doesn't look great at low resolution and the Inky Frame's dithering detracts further. Two versions with increased saturation (+25 and +50 in GIMP) to bring out the colours in the sky are shown for comparison.
Step 11: Image Suitability - Landscapes


The image on the Inky Frame looks ok but detail is still lost despite the original image not being detailed. There's some very apparent banding in the sky. This is more like a re-interpretation of the original that's interesting in its own right!
Step 12: Going Further


The ink and watercolour art work and some early computer generated imagery work well on the Inky Frame.
Ideas for areas to explore:
- Slide show program improvements
- Make button D show a status page.
- Use the display to show errors and exceptions where possible.
- Add an index file to order the images.
- Support images in sub-directories.
- Look at using Wi-Fi to download images over the Internet. The code which reads VSYS may need modifying to stop it interfering with Wi-Fi hardware.
- Check the RTC timer accuracy. It's possible this varies per chip.
- Check how the current varies for the display refresh and deep sleep mode with voltages between 3.4V and 4.9V. Check to see if it varies with the current image and the new image.
- Adapt an existing Frame for the Inky Frame. The IKEA RIBBA 23x23cm frame is very close to the Inky Frame size if the mount is used.
Other Inky Frame projects:
Further reading:
- Nordic Semiconductor: Become an expert on power profiling your application (YouTube)
- Electromaker: How to reduce power consumption in your project (YouTube)
- E-Ink Color Technologies Gallery Advanced Color ePaper (ACeP)
Christmas gift ideas:
- WWF (UK) online shop
- Amnesty International (UK) online shop
- Kitronik Gift Ideas
- Adafruit Gift Ideas
- Cytron Gift Ideas
- BBC News: Five ways to spend and waste less this Christmas
- Martin Lewis: Why sometimes the best Christmas present is giving nothing at all
- Disaster Emergency Commitee (DEC) fund raising for Ukraine - an umbrella organisation for multiple large charities.
- UK to Ukraine - providing generators and other essential items for Ukraine, collaborating with the HAFGB charity and the Healing Hand Network Charity.


![Tim's Mechanical Spider Leg [LU9685-20CU]](https://content.instructables.com/FFB/5R4I/LVKZ6G6R/FFB5R4ILVKZ6G6R.png?auto=webp&crop=1.2%3A1&frame=1&width=306)


