

Introduction: Curved Kerf Bending Part 2


This instructable is a continuation of my previous experiments with kerf bending (also known as lattice hinges) seen here https://www.instructables.com/id/Curved-laser-bent-wood/
I had previously experimented with a variety of lattice hinge patterns to find the optimal geometry for flexibility in a quest for a pattern that bends in multiple directions. What I did accomplish was how to apply a pattern to a curved surface, but the approach was basically a crude approximation.
I have been inspired by conversations with my good friends Arthur Mamou-Mani and Andrei Jipa (who created an amazing lattice hinge installation for BuroHappold Engineering seen here http://mamou-mani.com/burohappold/) to further explore the concept of parameterizing lattice patterns. This instructable goes a bit more in-depth about a technique for applying a pattern based on actual surface curvature.
To do this, I am using Rhino and Grasshopper. If you use Rhino, you can download Grasshopper for free and use the file I've provided. If you don't have Rhino, maybe this information could be useful for developing your own technique or could be a starting point for other experiments.
For more information on the science behind lattice hinges, I still highly recommend reading the articles on Deffered Procrastination here http://www.deferredprocrastination.co.uk/blog/2012/minimum-bend-radius/
Step 1: Guassian Vs Mean Curvature... Is It Developable?

For the purpose of this instructable, I will assume we are working with a rigid material with minimal flexibility and plasticity (such as wood, paper, acrylic, etc.) so we will only be concerned with developable surfaces. It is possible to create non-developable (or doubly-curved) surfaces with lattice hinges by expanding the pattern, but this is only possible with flexible materials (metals and plastics) and is a much larger conversation about geometry (check out Daniel Piker's blog).
So, what is a developable surface? Good question. A developable surface is one that only has curvature in one direction. What does that mean? Even better question. I found an article that explains it well here http://brickisland.net/cs177/?p=144. "Surfaces with zero Gaussian curvature are called developable surfaces because they can be “developed” or flattened out into the plane without any stretching or tearing. For instance, any piece of a cylinder is developable since one of the principal curvatures is zero". Basically, if you pick one point on a surface and intersect that surface with a plane at that point, that gives you the principle curvature in one direction. If you intersect the surface with another plane perpendicular to the first, that gives you the principle curvature in the second direction. Mean curvature is the average of the two principle curvatures and Gaussian curvature is the product of the two principle curvatures. Developable surfaces are defined by surfaces with zero Gaussian curvature.
(Image from Wikimedia Commons)
Step 2: Measuring Curvature


This technique uses Rhino https://www.rhino3d.com/ and Grasshopper http://www.grasshopper3d.com/, a visual programming environment for Rhino. A copy of my Grasshopper file can be downloaded on this page.
The first step is, of course, to measure the curvature of your surface. Luckily Grasshopper has a built in function for doing this. The inputs are a surface and UV point(s) on that surface. The outputs are planes normal to the points, Guassian curvature, and mean curvature at each point. If you look at the output of mean curvature, there will be a range of numbers both positive and negative. This is because the curvature is compared to a vector, typically in the positive Z direction.
For the purpose of creating a lattice hinge, we don't want to know the curvature at each point, but the change in curvature across the surface. Areas with very little change can have wider and less flexible hinges, while areas with a lot of change will need thinner and more flexible hinges. To do this, I measure the relative distance between each curvature value, then re-map those values into a range of 0 to 1. This way 0 means no change and 1 means maximum change.
Attachments

Step 3: Morphing a Grid Using Curvature


Now I have a 3D surface with a grid of points and values for change in curvature for each point. Next I want to shift the points in my grid based on my curvature values so that points with greater curvature will be closer together. I wrote a Python script to incrementally add each curvature value and re-mapped those values to match the domain of my surface. This way each value lies on the surface proportionally to the curvature value. (Note: I am not a very good programmer, so my method may not be the best).
Next I want to unroll (flatten) my developable surface and apply my morphed UV coordinates to that surface. Rhino has a command to unroll a surface (Surface>Unroll Developable Srf). With the unrolled surface, I apply my morphed grid and use Paneling Tools to morph a 2D pattern of curves to each cell of the grid.
The settings at the beginning of the definition will change your pattern for laser cutting. U Count is the number of divisions in the U direction (parallel to the cuts). V Count is the number of divisions in the V direction (perpendicular to the cuts). Typically you will want a smaller number in the U direction and larger in the V direction so that your lattice springs are longer and more flexible (this could be mathmatically applied but I will talk about that in the last step). The Domain start and Domain end sliders affect how the curvature values are re-mapped, and in turn, the magnitude of how they are morphed. Values of 0-1 tend to make patterns that are too close together to laser cut. Setting the Domain end value to somewhere between 0.4 and 0.6 tends to work the best.
Step 4: Shooting Laser Beams


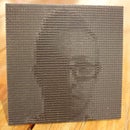
I did some tests using 1.5mm poster board, only because it is what I had available. I wont go into detail about laser settings since that is dependent on the laser you use and the material. The poster board reacts a lot like wood, so it was a good test material. I tried a few variety of tests to experiment with different UV settings and varied magnitudes.
I also experimented with some surfaces showing Gaussian curvature. Somehow, Rhino treats some surfaces as developable when they actually have some doubly curved sections (don't ask me how). I tried the same method but instead measuring Gaussian curvature and the results looked promising. As you can see, they did not bend how I expected them to. This will take some more investigation and experimenting.
Step 5: Conclusions & Next Steps


This method seems to be a decent approach to bending complex curved surfaces. There is still a lot to test and experiment with. The next thing to try would be parametrically adapting the UV pattern based on material thickness and bend radius. This should be possible if you measure the overall length of the surface and use that number to divide it into appropriate lengths using the formula here https://www.deferredprocrastination.co.uk/blog/2012/minimum-bend-radius/#more-2743
Another area to explore is surfaces showing Gaussian curvature. Here is lattice hinge pattern that allows curvature in two directions http://lab.kofaktor.hr/en/portfolio/super-flexible-laser-cut-plywood/. It would be interesting to manipulate this pattern to bend according to Gaussian curvature. It could be possible to measure principle curvature in each direction, then morph a grid along two axis rather than just one.
There is much more to try. Enjoy shooting your lasers and please share anything you learn!

Participated in the
Full Spectrum Laser Contest 2016


