

Introduction: Holographic Halloween Pumpkin Patch


This tabletop holographic-like Halloween diorama will amp up the spookiness level of your holiday decorations. This same diorama can be repurposed for other holidays or just to add to your every day cool factor. We have also made winter holiday versions and a Jurassic park version of this project. This project uses a "Pepper's Ghost" effect which is an illusion technique used in theater and amusement parks.
Supplies
3 shoe boxes (and maybe one or two additional boxes)
2 foam pumpkins (cut length way in half)
1 digital download of a creepy backdrop (from Etsy.com or other digital art sources)
1 LED Flexible RGB Strip Lights (available at target.com)
1 5"x7" glass plate from a discarded picture frame
1 pad device (Android or iPad)
for iPad: Lightning to USB3 Camera Adapter to connect Makey Makey to iPad
for Android: OTG cable to connect Makey Makey to pad device
1 Makey Makey
1 banana
Jack-O-Lantern Jamboree Hollusion videos from atmosfx.com (purchase a set or individually)
misc craft supplies, cardboard, hot glue gun
Step 1: Background Box

This construction will consist of three shoe boxes. This is the Background Box into which the Front Stage Box will need to slide into. A spooky backdrop is affixed to the back of the box. A strip of RGB LED lights is cut and affixed to the top of the inside of the box above the backdrop to light the backdrop and back of the stage. If these are remote controlled lights, you will be able to control the color of the lights. The bottom of the box is cut as shown.
Step 2: Diorama Insert


A 4" wide piece of cardboard which is the length of the inside of the Background Box is used to mount three small foam pumpkins and other items that you want to use to decorate the diorama stage. Two foam pumpkins are cut in half lengthwise so three half pumpkins are hot glued to the cardboard as shown. Jack-O-Lantern video images will be projected onto these pumpkins. I've added some fake grass, some other greenery, and pebbles to the cardboard. All of these are hot glued into place. The completed cardboard diorama insert is slid into the back of the Background Box as shown.
Step 3: Front Stage Box


Cut the front and bottom of the Front Stage Box as shown. Mount the picture frame glass at 45 degrees as shown. You can use small pieces of cardboard as shown to secure the plate of glass into place. The video image from the pad device will be reflected on this glass and create a ghostly image superimposed with your stage. Go ahead and decorate the front of the Front Stage Box as desired. Slide the Front Stage Box into the Back Stage Box and set aside.
Step 4: Load Your Videos and Code on Your Pad Device
Below is a simple html file that can be loaded into your pad device along with the Hollusion effect videos that you can purchase and download from the atmosfx.com website. The Hollusion videos are simply videos that have been filmed against a black background to make it easy to superimpose them on the stage. For this project, I'm using the Jack-O-Lantern Jamboree videos. The videos should be put into a directory named "Movies" in whatever location you put the webpage. Play this webpage under a Chrome web browser (other browsers may also work, but this is the one I've used and tested). This code will play the 4 videos named in the code and located in the Movies directory. The right arrow key will advance and play each video and then repeat. Test this to make sure this works before proceeding.
<html>
<head>
<title>Video</title>

<style>
video::-webkit-media-controls {
  display:none !important;
}
</style>
<script>
document.onkeydown = checkKey;
var videos=["Movies/pfaces1.mp4","Movies/plimerick1.mp4","Movies/pfaces1.mp4","Movies/plimerick2.mp4"];
var vid=0;
function checkKey(e) {
    var videoElement = document.getElementById("videoElement");
    e = e || window.event;

    if (e.keyCode == '38') {
        // up arrow
    }
    else if (e.keyCode == '40') {
        // down arrow
    }
    else if (e.keyCode == '37') {
       videoElement.pause();
    }
    else if (e.keyCode == '39') {
       // right arrow
       videoElement.setAttribute("src", videos[vid]);
       videoElement.play();
       vid= (vid+1) % 4;
    }

}


</script>

</head>
<body style="background-color:black;">
<video id=videoElement playsinline>
  <source src="Movies/pfaces1.mp4" type="video/mp4">
  <source src="Movies/plimerick1.mp4" type="video/mp4">
  <source src="Movies/pfaces1.mp4" type="video/mp4">
  <source src="Movies/plimerick2.mp4" type="video/mp4">
  Your browser does not support the video tag.
</video>
<script>
videoElement.addEventListener("dblclick", function() {
      var videoElement = document.getElementById("videoElement");
      videoElement.webkitRequestFullScreen();
  }, false);

videoElement.addEventListener("click", function() {
       var videoElement = document.getElementById("videoElement");
       videoElement.setAttribute("src", videos[vid]);
       videoElement.play();
       vid= (vid+1) % 4;
  }, false);

</script>
</body></html>
Step 5: Attach a Makey Makey and Test
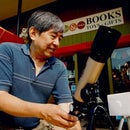
Attach a Makey Makey to your pad device. You will need an adapter cable to get this to work. Use an OTG cable adapter if you have an Android device. Use a Lightning to USB3 Camera Adapter if you have an iPad device. Attach the Makey Makey and test it. Touching the right arrow pad and the ground pad should cause the video to play in your browser window. Now construct any button you wish to use to activate the video. I use a banana because "Why not?"
Step 6: Mount the Pad Device in the Pedestal Base


Use the third shoe box sitting vertically on its side to create a pedestal base, cutting it as shown. Mount the pad device around 2" to 3" from the top. You can either accomplish this by building a cardboard shelf or simply finding a small box that is tall enough to set the pad device on top of. Notice that the pad device should be positioned so that the video is upside down. You may also want to tape some black paper on the pad device to eliminate any unwanted reflections. You will want to cut a hole in the side of the pedestal for the cable connecting up the Makey Makey.
Step 7: Final Assembly


Put the combination of the Background Box and Front Stage Box on top of the pedestal. You can position the boxes and you can slide the Front Stage Box in and out to set exactly where the image will appear on stage. Oddly enough, you will find that as you move from side to side, the eyes on the pumpkins seem to follow you.
Turn on the LED stage lights, connect up your banana, and have FUN! To finish our project, I added contact paper to the outside of the boxes to slightly improve the appearance of the project. You will probably be able to do a nicer job than I did!
Step 8: Final Notes
What's cool about this project is that you can easily swap out the background and insert a new diorama insert and run a different set of videos. Here's an example of our Jurassic diorama using the Dinosaurs videos from atmos.fx
Thanks for checking my project out. I hope you build this instructable. Let me know how it works.

Participated in the
Halloween Contest


