

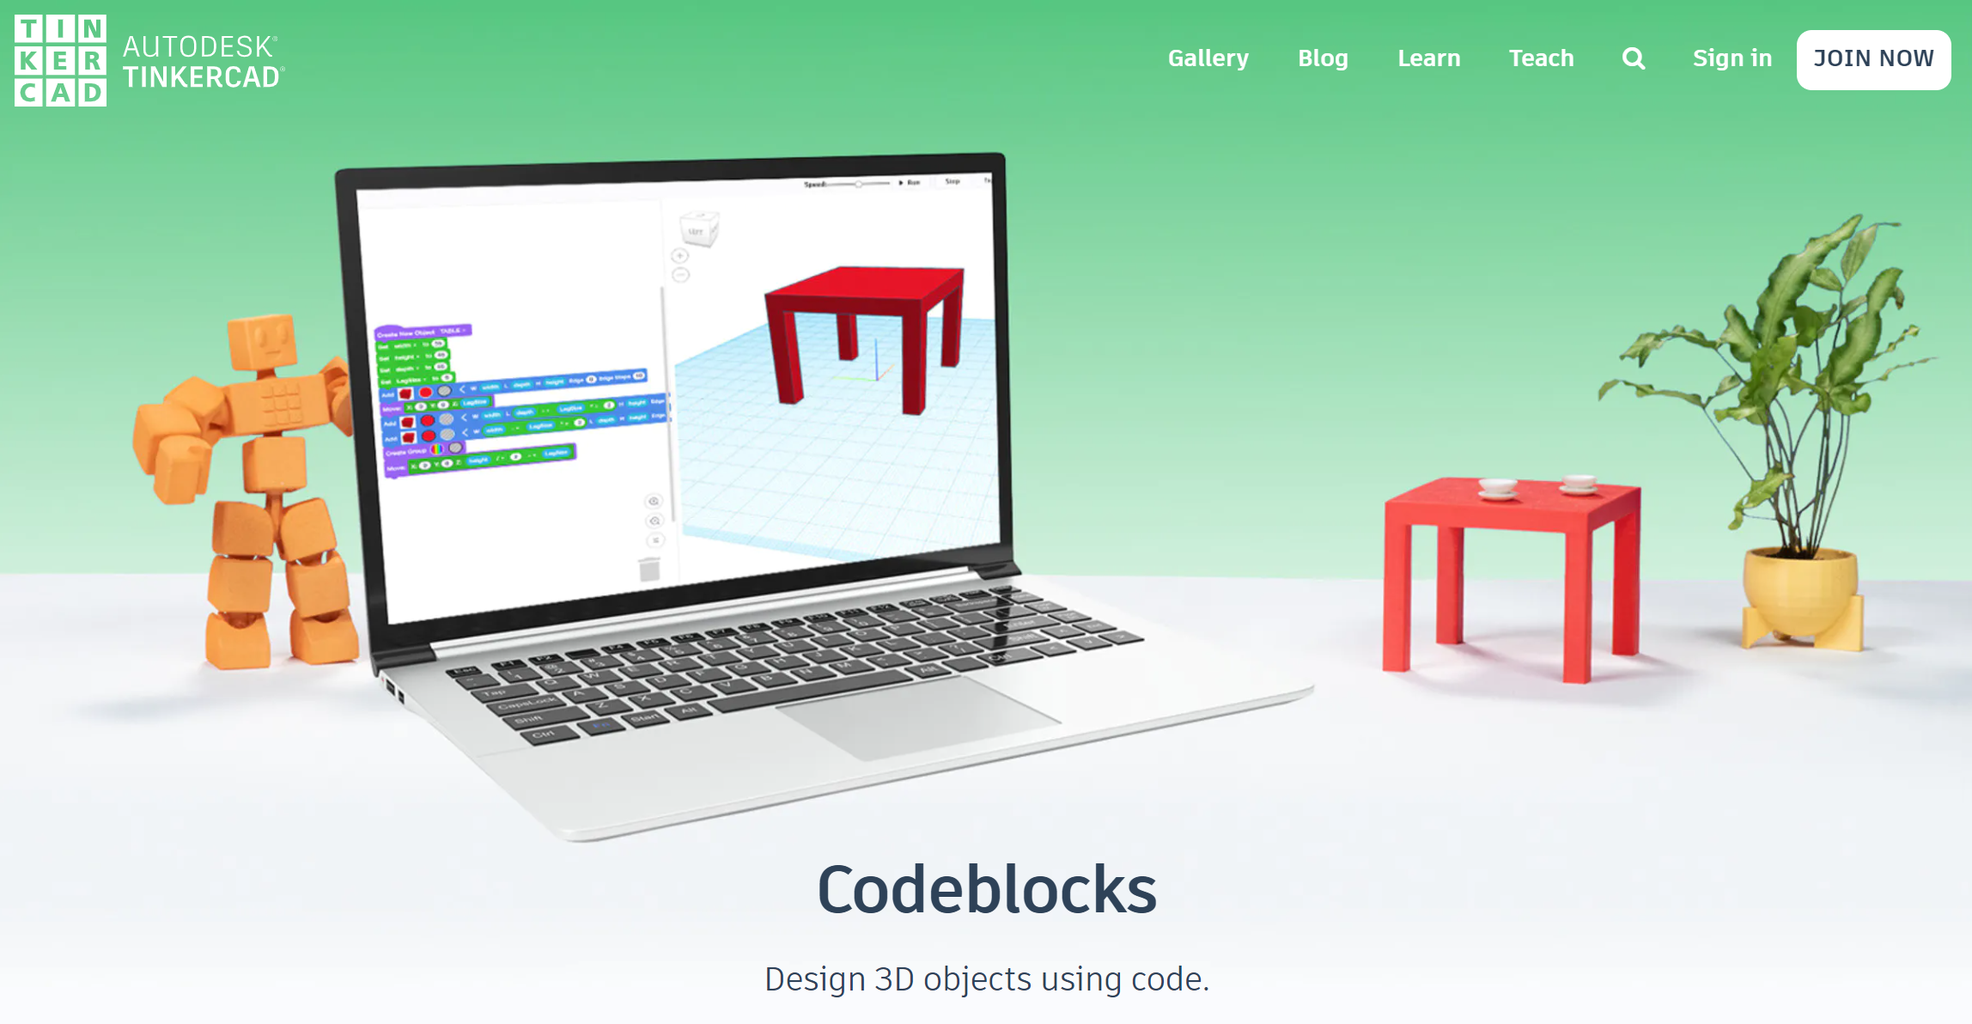
Introduction: Ornament Generator With Tinkercad Codeblocks


While brainstorming ideas for Maker starter projects with a seasonal slant, we played with the idea of 3D printing holiday ornaments. We wanted to make a project starter that was easy to do at an event like a Makerspace Open House, faculty meeting, or as a quick Maker skill builder that can be done in those flexible periods before winter break.
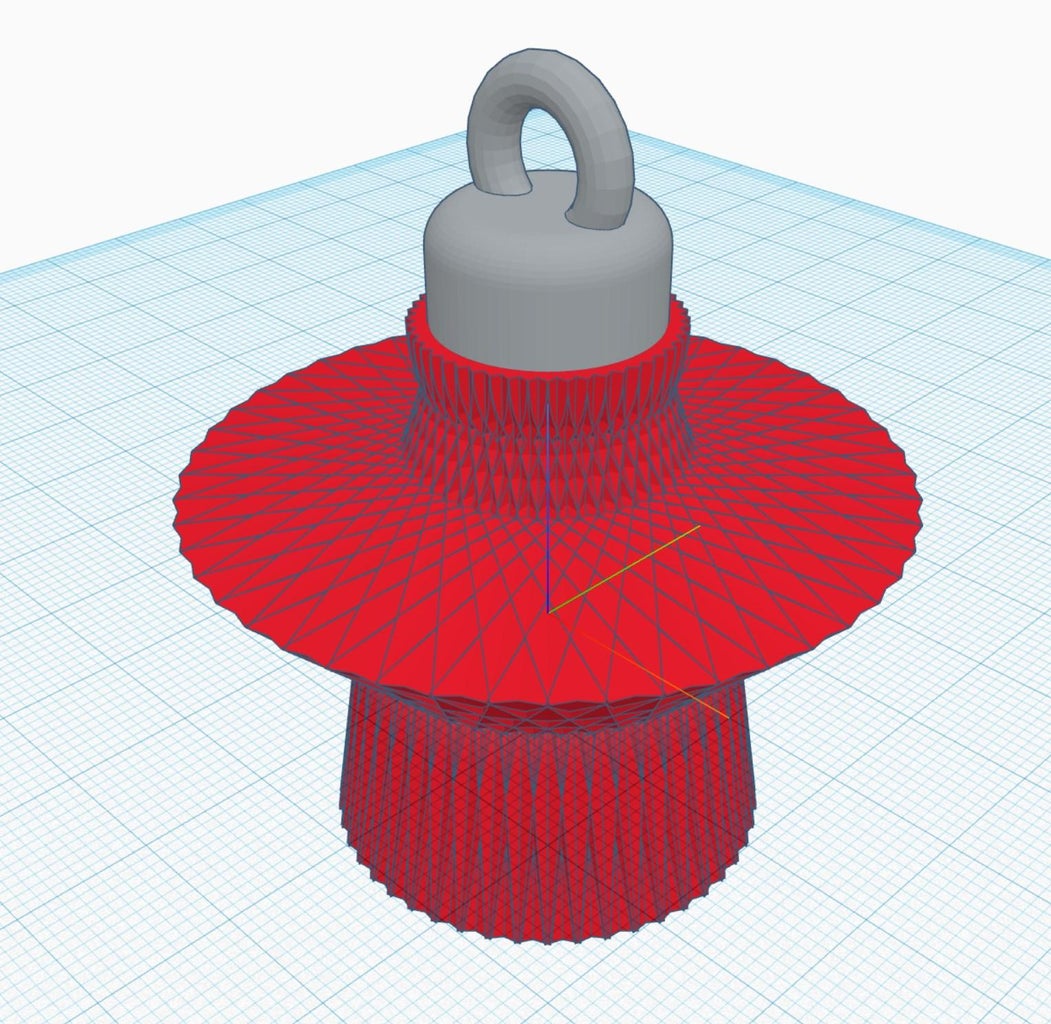
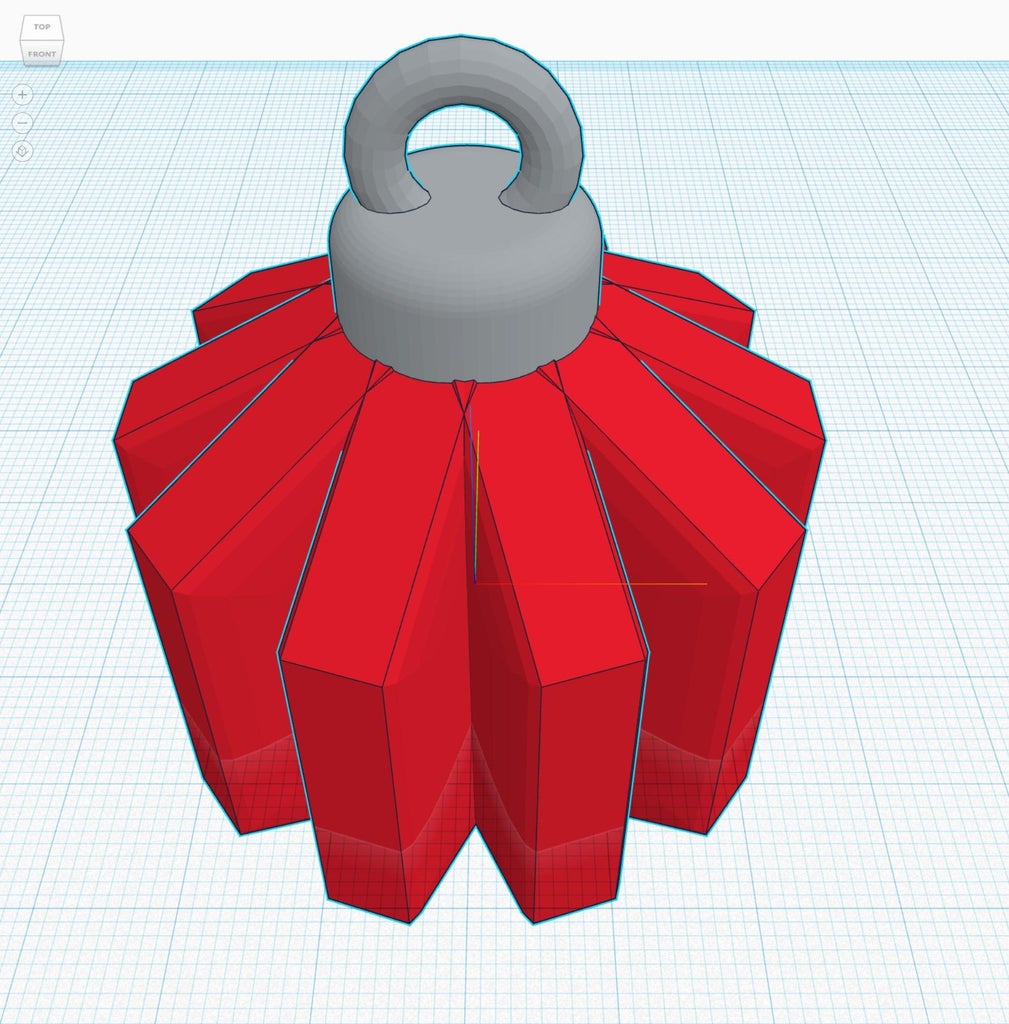
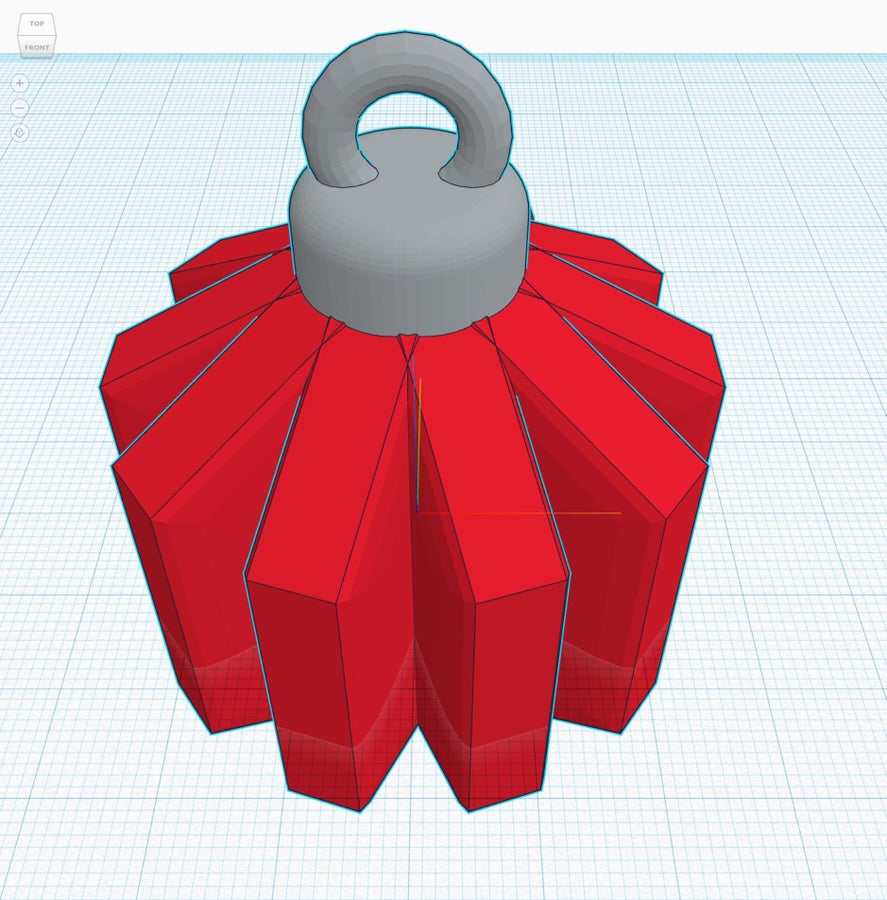
This generator works by creating a shape that is then copied and rotated around the Z axis. You can adjust the shape, thickness, and number of copies to create ornaments with fins, ridges, smooth surfaces and more. The generator finishes the ornament with a cap and loop for hanging.
This project uses variables (and some clever toggling with Repeat blocks) up top to adjust parameters of the ornament, making it perfect for beginners, or as a starting point for more experienced students to tinker further. It also breaks easily, which could lead to some fun troubleshooting!
Ornament Generator Codeblocks Project: https://www.tinkercad.com/codeblocks/lKYiRrSTn3D
Takes some cues from our Random Daisy Generator which was inspired by this random snowflake generator.
Supplies
Step 1: Define Variables

Before we start building the code that actually makes our ornament, we need to create the variables that will act as settings we can use to make adjustments without editing the actual code.
Add a Create New Object block and call it settings. Add Create Variable blocks and call them copies, thickness, and trim.
While it's not necessary for the code to work, creating an object to hold our variables in one place helps us keep our code organized. Using comments also helps us keep track of our code and helps it makes sense when sharing with others.
Step 2: Create the Source Shapes


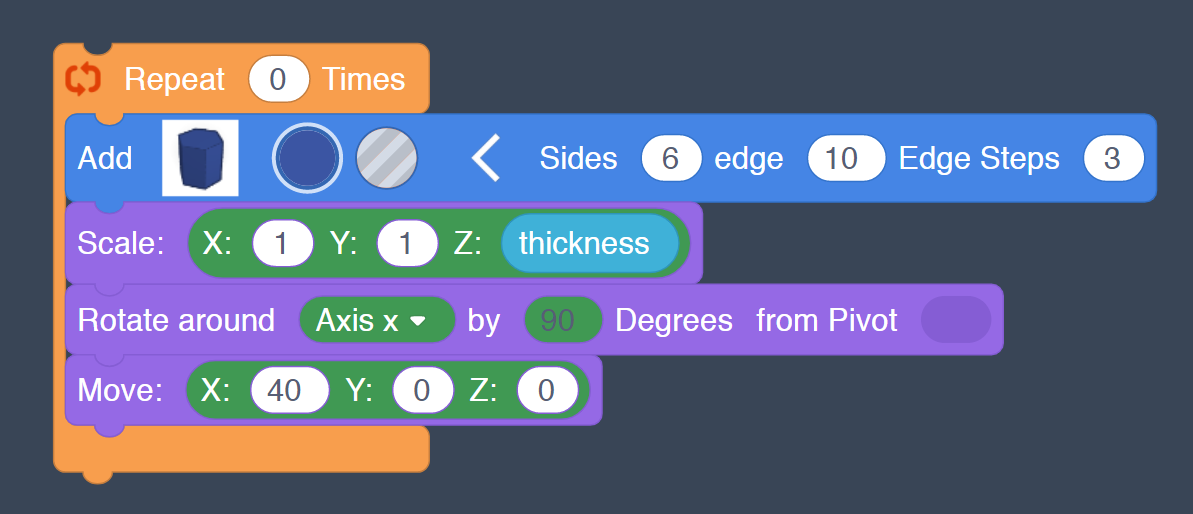
Start by adding another Create New Object block and naming it Source Shape. Add a Repeat loop. We will be making several shapes to use with the generator - we use the Repeat block to toggle on or off the blocks that create a particular shape. Set a repeat to 0 and the code in the loop is ignored; set it to 1 and the code will run! (This does the same thing that "commenting out" your code does in text-based programming languages.)

Add a shape - we'll start with a polygon. Click on the arrow icon to expand the options for the shape. Set the sides to 6, edge to 10, and steps to 3 (this will create a hexagonal prism with slight bevels on the top and bottom edges.) For now, match the parameters of the example - if you start changing things now, later steps will probably need adjusting and it could get messy. It's better to get the code working first and then come back to put your own spin on it.
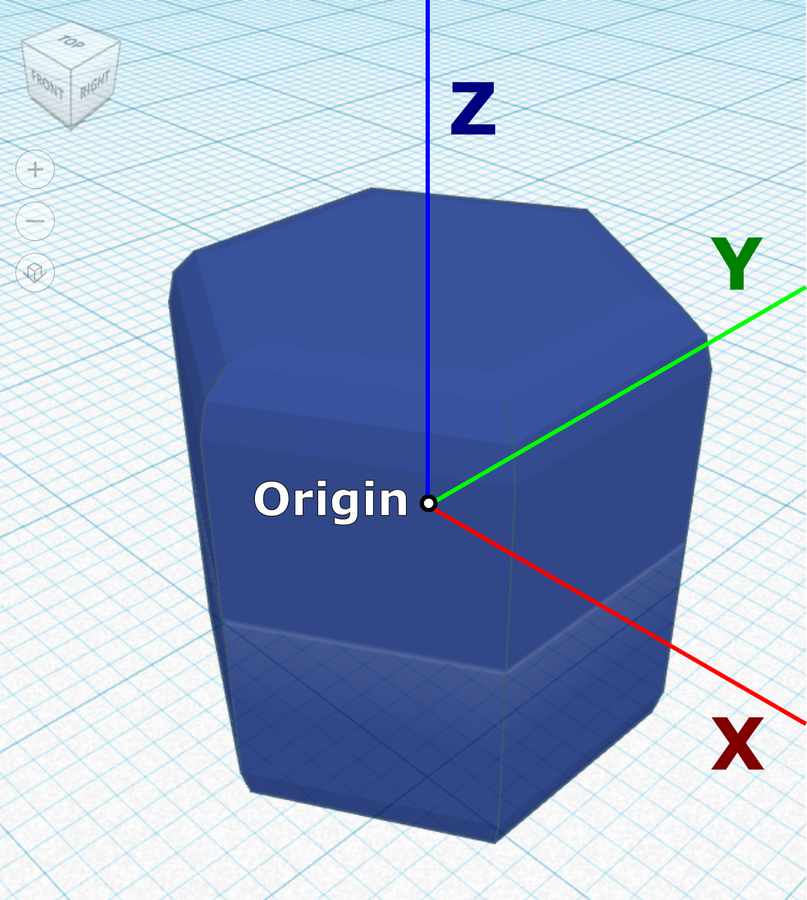
Let’s get familiar with the 3-axis coordinate system in Tinkercad. The Origin is the center of the grid where X, Y, and Z all equal 0. It can be hard to tell by looking, but the axis lines all start on the workplane. When a shape is added it is centered on the Origin with half of it below the workplane. You can see a white shadow where the shape passes through the workplane.
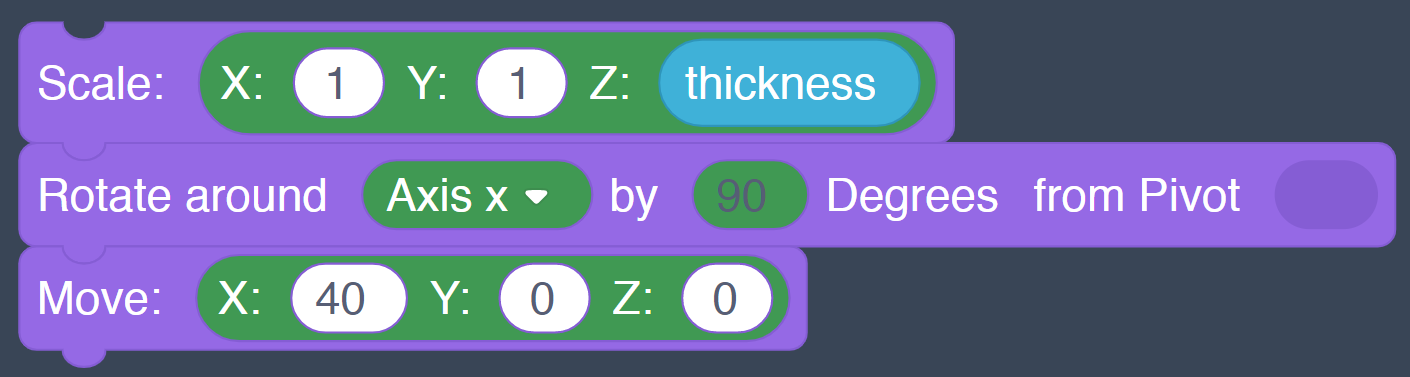
Now to adjust and position the shape. Add a Scale block - it multiplies the dimensions of the shape for X, Y, and Z directions.Use the thickness variable for Z. Whatever we set in the thickness variable at the top will now change the height of our source shape.
Add a Rotate block to rotate the shape 90 degrees around the X axis - this simply turns the shape so it is standing up.
And lastly, add a Move block. (This isn't entirely necessary, but it helps with troubleshooting later if the source shape is not in the way of the ornament while your code runs.)
That's one shape set to go for our generator! This "source shape" will be copied to create the actual ornament in a later step. Now that we've mastered the basics, let's add some additional shapes, like a ring, heart, and star. Notice that there are some differences in the code for the heart and star - each shape is scaled or positioned differently in Tinkercad and needs a little tweaking to make it fit in with the rest of the code in the generator.
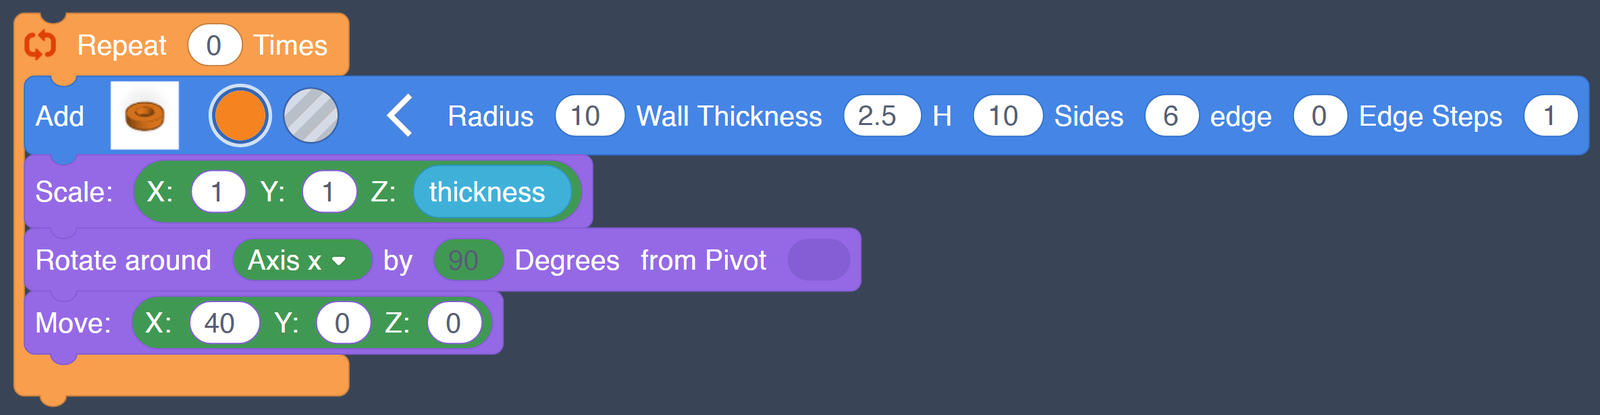
Ring (makes a hollow hexagon in this configuration)
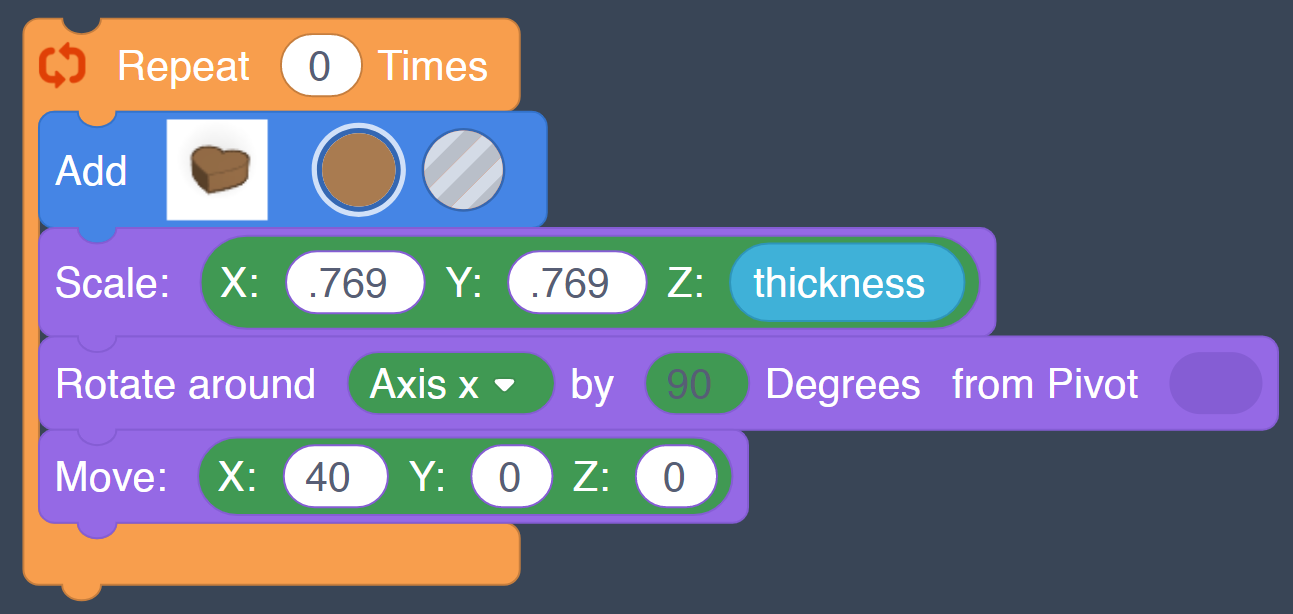
Heart (had to adjust scaling to make it fit with the cap made later)
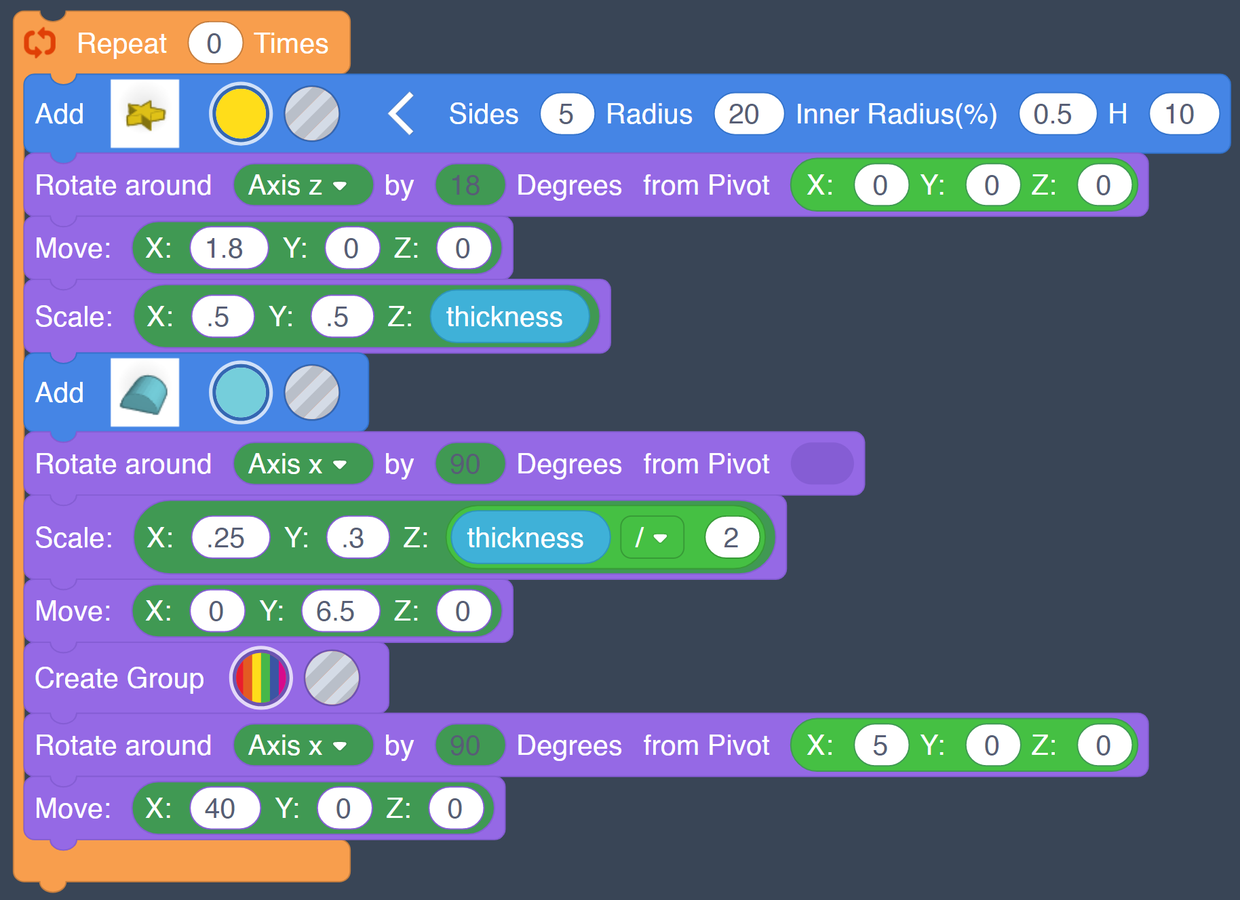
Star (this one gets a little more complicated - the star needs to rotate so that a point is upward, nudged over so it stands up correctly, and it needs a half-circle added to support the cap for 3D printing.)
Step 3: Create the Cap and Loop


To hang the ornament we need to add a loop to the top. To make sure that the loop connects to any ornament shape properly, we need to add a base as well.


First, add a Create New Shape block and name it cap. Then add a cylinder with a radius of 3, height of 6, and sides to 64. Set the edge to 1 and the edge steps to 24 - this creates a nice rounded edge on the top and bottom of the cylinder. Add a Move block to bring the bottom of the cylinder up to the top of the workplane.
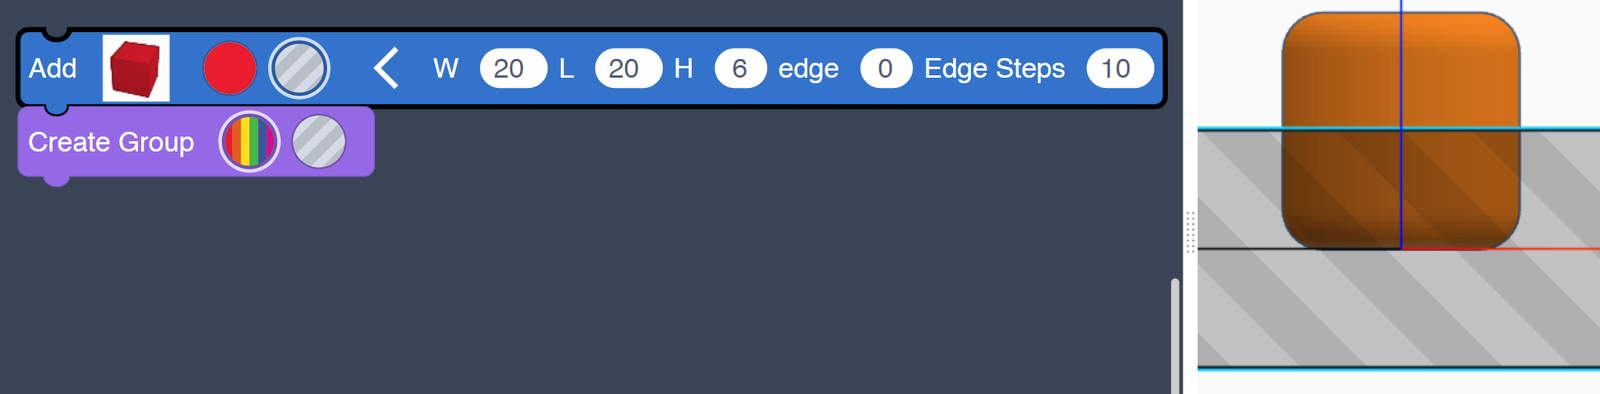
Now we need to cut the cylinder in half. Add a box, make it a hole, andset the height to 6. Remember that the box is created centered on the origin - only the part above the workplane will cut the cylinder. Add a Create Group block to make the cut!
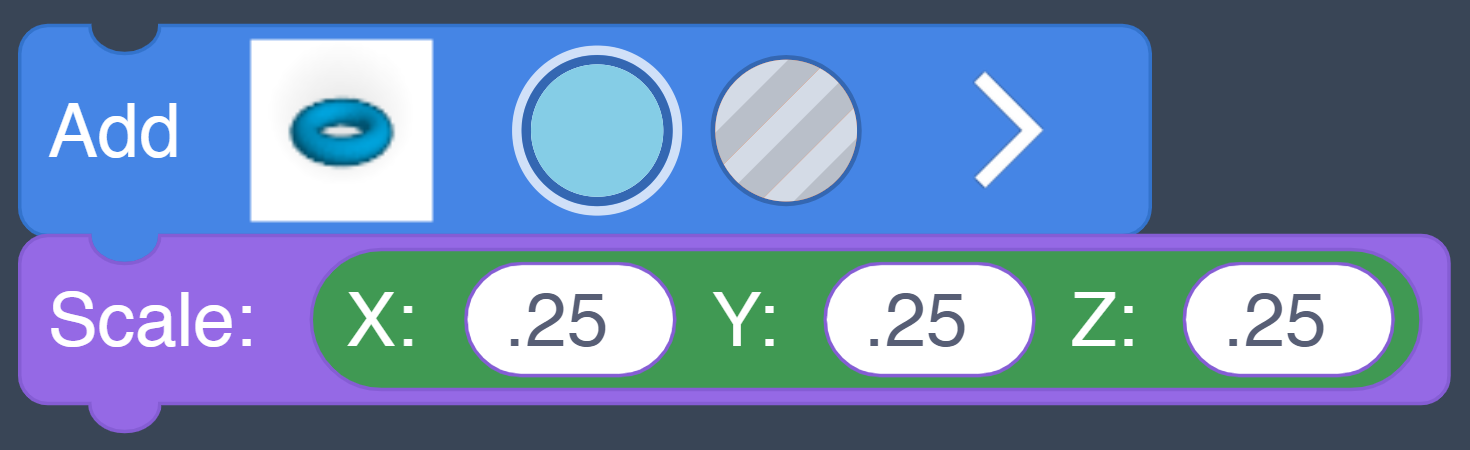
Next add a torus and a Scale block set to .25 - remember, the scale value is a multiplier. This will shrink the torus down to 1/4 size.

Add a Rotate block and a Move block to put the torus in position with the cap.

Add a Create Group block and set the color - the color is just so the torus and cylinder parts appear as one piece in our design.
Step 4: Rotate Copies of the Source Shape

Now we get to use that source shape that we created in step 2! In this step, we will create a new object that is made up of copies of the source shape that have been rotated around the Z axis.

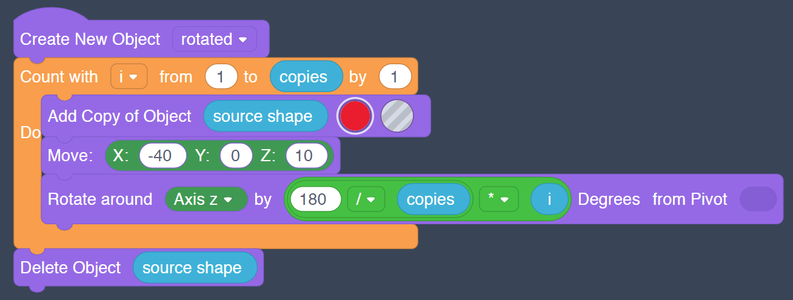
Start with a Create New Object block. We'll call it rotated. Add a Count with loop. This loop will allow us to do something a certain number of times, and each time the loop runs the variable i will increase. We want to have i start from 1 and increase by 1 each time the loop runs, until it gets to the number of copies set in the copies variable. We will use the i variable later in the loop!
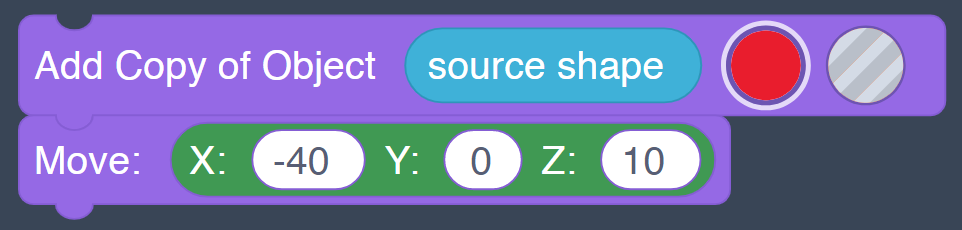
Add a Add Copy of Object block and select source shape. (Setting the color of the copy to something different than our source shapes lets us tell the copies apart from the original if something goes wrong with our code.) Add a Move block to place the copy back on the Origin and shift it up to meet the cap that we positioned earlier.

add a Rotate block. Here's where that i variable comes in handy - we can rotate each copy based on which iteration it is. Starting from 180 degrees, we divide by the number of copies to figure how many degrees each piece should be rotated away from each other. If we stopped our math there, every copy would end up in the same place. By multiplying by i, we can rotate each copy to right spot!
Why 180 degrees and not 360? Each shape is pivoting around the Z axis from its center, meaning we only need to calculate for one side of the circle - the other 180 degrees of the circle is made up of the other half of the shape.
Step 5: Group and Scale the Ornament
In this step, we will group the body of the ornament and the cap together then scale it up to a more reasonable size for 3D printing.

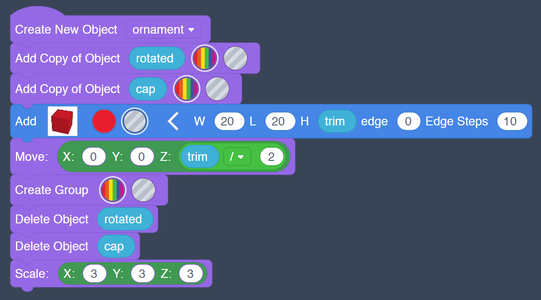
In order to group the body of the ornament and the cap together as one object, we have to create a new object called ornament and add an Add Copy of Object block for each shape.

Now we will add a block, set it as a hole, and then set the height of the block to our trim variable. This will cut the bottom of the ornament flat to make 3D printing easier.
To make our trim variable be the actual height that we want to be cut off the bottom of the ornament, we need to move the block up so it is on the workplane with a little math - we know the height of the block above and below the workplane is the same, so we have to move it up by half, or the quotient of trim ÷ 2.

Lastly, we create a group, delete the rotated and cap shapes (since we made copies earlier in this step), and then scale up the ornament to a slightly larger size.
Step 6: Enjoy and Share!
Thanks for trying our Instructable!
We hope you had fun creating Ornaments with Tinkercad Codeblocks! What did you make? We want to see! Share your Makes here, or drop us a message. If you did this activity with K-12 students, let us know what grade level and content area.
Join our mailing list to get the latest news, tips, and insights from the K-12 Maker Lab!
Visit our website k12maker.mit.edu to get free Maker resources for K-12 teachers!
- Starter projects - simple things to make while you learn to use Maker tools
- Maker skills workshops for K-12 educators - Spring, Summer, and Fall.
- Makerspace Design Guide for K-12 Makerspaces.
- Lists of Tools and Materials and illustrated charts to print and post.
- Supervision and safety guidelines for shop administrators.
- Training guides for common tools (including student checklists and refresher guides).
- Our Maker Methodology for designing Maker Projects for core curriculum, including sample projects.


