

Introduction: Bike Wheel Gyroscope


Why is it so much harder to stay up on a stationary bicycle? Why don't Segway tours always fall flat on their faces? How do smartypantsphones know when they're face up? The answers are wheely similar, and all lie in the realm of angular momentum and gyroscopes. They keep spinning things in check.
Brilliantly, there have been great science demonstrations using a bike wheel like this one at MIT. Also this one from Veritasium or this one from the Exploratorium. These can all demonstrate physics phenomena like gyroscopic procession and conservation of angular momentum. They're also just plain fun.
Since a lot of the gyroscopes require harder to acquire materials than just a bike wheel, companies have made things like these demo tools for sale. Let's make our own instead!
I wanted to make one for my classroom with extremely basic supplies for any bike wheel available. Basically just wood, clamps, and a wheel. Here we go!
- What: Bike Wheel Gyroscope
- Concepts: angular momentum, gyroscopic effects, centripetal force, torque
- Cost: bike wheel + $2
- Time: 30 minutes to make
- Materials:
- Bike Wheel (from dump, thrift stores, old bikes, anywhere!)
- Thick Dowel (I used 2" diameter and worked great. You'll need about 2 feet of it)
- Hose Clamp x 2 (from hardware store, big enough to fit around dowels)
- Firm Plastic (optional, for guards)
- Zip-Ties (optional, for guards)
- Tools:
- Saw
- Sander (optional)
- Drill
- Mallet (optional)
- Hole Puncher (optional)
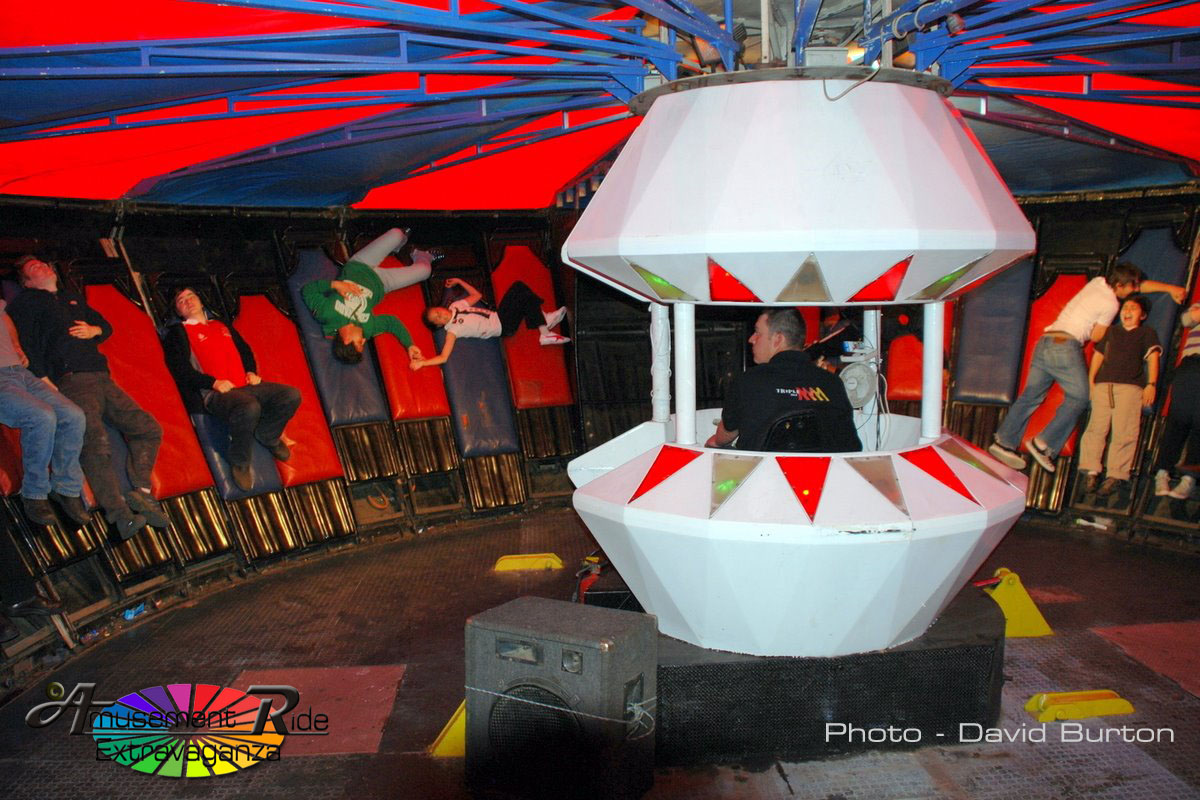
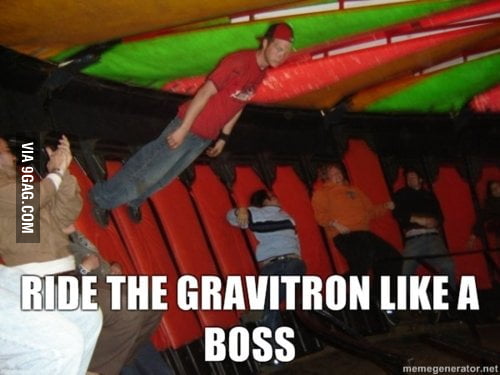
URBAN LEGEND SIDENOTE: The urban legend goes like this. The Gravitron at the carnival starts up, spinning faster and faster. People find themselves "glued" to the wall, their limbs barely able to be lifted toward the center of the ride. The floor drops out. The teenagers are holding hands, the brothers are playfully "punching" each other by putting their fists in front of the other's face and letting them go limp. One woman is completely upside down. The ride operator isn't in the middle both. No, she is sideways, walking along the walls with her head toward the middle of the rotating ride. She is hopping over people playfully as she goes. She is living the dream of angular momentum. Is it possible? Let's find out!
Step 1: Make Some Handles


I started out cutting the 2" diameter dowel into two 9" lengths. This seemed like a good length for gripping. I sanded down the two ends that aren't going around the bike bolt to look a wee bit niftier.
Step 2: Drill Handle Holes


First, remove all extra hardware from your bike wheel so only the axle bolt remains. You want to choose a drill bit that is just a tad bit smaller than your bolt to get a snug fit. Drill holes in one end of each dowel (not the sanded end) so that the depth is about equal to the length of your bike bolt.
Step 3: Saw Some Kerfs


Kerf! What a fun word! It is the process of taking out a little bit of wood for easy bending. Use a saw to cut a slit down the dowel end you just drilled. You want it to slice right through the hole. This is to remove a little wood so that we can cinch the dowel around the bolt even tighter.
Now put on your wooden handles on the both sides of the bike wheel. Ideally it's the perfect tightness where you can screw it on with your hand. If you need, you can also use a mallet to tap it in. Don't worry if it doesn't feel tight yet. That's the next step!
Step 4: Hose Clamps!


Oh these things are brilliant. Take a hose clamp and slide it up the dowel so it's near the bike wheel. It should be surrounding the slit you just kerfed. Use a drill with a flat driving bit to screw the hose clamp, making it tighter. When it's nice and tight, cut off the extra tab. You can throw some duct tape on the end to cover up the sharp parts.
The handle should be snug now. Thank you to Josh at Pier 9 for this amazing trick. May we all use it often.
Step 5: Make Some Spoke Guards


If you want to avoid spinning spokes + fingers, these are great to add. I made some circles on some firm plastic by tracing a glue bottle, but any big circle around you will do. Cut it out and cut out holes in the middle that are big enough to slide around your bike bolts. These discs are the guards!
Step 6: Attach Your Guards


We're going to use zip-ties to keep this all together. Take off your handles, and place your guards over the bolt. Use a Sharpie to mark points near the outer perimeter where spokes run underneath. Drill these out (I used a nail as a drill bit) or use a hole-punch to make the holes. You can then zip tie them to the spokes, and cut of the extra stems. Huzzah! Safe fingers are happy fingers.
Step 7: Take It for a Spin!


Oh there is just so much to do with a spinning bike wheel gyroscope!
Here are a few to start out with:
- Get it going fast, and then start to rotate it side to side. Sit in a swivel chair and see which way it pushes you back.
- Take the wheel in one hand while it's spinning, and rotate around in a circle. Which way does the wheel push your arm? What happens when you rotate it?
- Attach one handle to a hanging string or chain and get the wheel spinning. What happens?
All of the effects depend on the speed of rotation, the mass of the wheel, and how that mass is distributed. Basically, faster/heavier/furtheroutmass makes the forces go wahoo! I sized up to another bike wheel in the third picture, and the effect was amazing.
The effect is a great illustration of the conservation of angular momentum. Namely that when something is spinning, it will continue to spin unless forces act otherwise. And something staying still will remain still. When you have the spinning bike wheel in your and, and you rotate it, you are applying torque to change its angular momentum. By Newton's Third Law, every action will have an equal and opposite reaction, which just means that it's going to push back. Take that! When you rotate the bike wheel in your hands, see which way it pushed your body.
The overall effect is to keep you still, which is why gyroscopes are so commonly used as stabilizers. It helps keep you upright on a bicycle, keeps spaceships alligned, and even lets the operator walk perpendicular to the ground and seemingly float in The Gravitron. :)
Have fun, share what you find, and keep exploring. :)


