

Introduction: Tinkercad Gears


This a a really simple mechanism that can be used in other projects or as a fidget toy.
To make this project we are going to use Tinkercad.
Tinkercad is a free online 3D modelling software currently celebrating their 10ᵗʰ birthday🎉🎉
Attachments

Supplies
Tinkercad (free)
3D printer
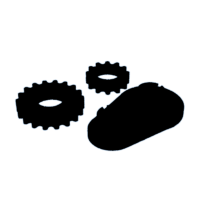
Step 1: The Gears

The gears are made of useful gears as these are nice and smooth. Here are the settings:
pitch - 2
slop - 0.01
#of teeth - 12
height - 20
bore dia - 10
The second gear is the same but with 18 teeth.
(1.5 x faster as 18/12 = 1.5)
By playing around with the number of teeth you can create gear ratios.
Gear ratios spin at different rates!
The cogs are at an angle so that they can bind therefore spin together.
Step 2: The Base


The base is made up of two cylinders of the same diameter as the cogs.
Align these so they fit in shape.
These are joined together with two boxes at the same height as the cylinders.
my base is layered at 3mm high.
Step 3: The Axle


This is the bit this that the two gears will spin around on.
The two axles are made of tubes just smaller that the bore diameter of the gears.
To stop the gears coming off the axle I added a second tube higher than the gears and a 0.25mm bigger diameter.
Step 4: The Pin


For some flexibility room I created 3 holes in each axle using boxes.
we need flexibility as it will allow us to push on the gears.
In this stage I moved the gears off of the base and onto the floor where they can be printed.
In the gears I cut out two cones to ease on the fit.
Now it is ready for printing so you can export your model.
Attachments
Step 5: Printing

Once you have sliced your gears in you slicer program you can print it.
My gears took 1 hour to print in SVG.
There was some string between the two pegs but these where easily sanded down.
Step 6: Finishing Up

The gears should pop on to the pegs with a little force and spin freely.
This project was really fun to make and can have so many uses.
This website may give you some ideas!
I hope you enjoyed and
Stay safe!

Participated in the
Simple Machines Challenge


