

Introduction: Universal Bluetooth


Why have one bluetooth when you can have blueteeth?
With a wee bit of hacking, you can open up a bluetooth speaker and turn it into universal bluetooth for any speaker you might come across. There are products out there for this, but this is your very own hack job, and a great introduction to hacking electronics in general. Bluetooth devices seem to be everywhere, and now you can, too.
Grab a speaker and let's start hacking!
What: Universal Bluetooth!
Where: Absolutely everywhere
Concepts: Electronics, circuits, hacking, jams
Time: ~ 45 minutes
Cost: $ for speaker + $0.50 for audio jack
Materials:
- Bluetooth speaker (the cheaper the better)
- 1/8" audio jack (female, preferably mono, can be stereo)
- Fun fabric
- Heat shrink wrap
Tools:
- Small screwdriver
- Wire Cutters
- Soldering Iron / Solder
- Heat gun
- Hot glue gun / hot glue
Tooth time!
Step 1: Find a Speaker to Hack


This story all begins with a bluetooth speaker. The smaller and cheaper, the better. For the most part, the integrated bluetooth circuits stay the same, and it's just the amp and speakers that you're paying for. Which we're destroying!
Start by figuring out a way in. Often these are press fit together and a little leverage goes a long way. Remove the casings so that you get down to screws on the front and back. You'll immediately see a speaker on the front, and often have easier access to the electronics on the back. What do you see?
Step 2: Remove the Battery


Every bluetooth circuit will be powered by a small but substantial battery. Without the power needed to drive the speaker, these things can last quite a bit. You'll most likely need to free it by wiggling it free from its glue's death grip. No problem, even if you break a couple wires along the way.
We'll re-solder those later.
Step 3: Remove Bluetooth Circuit


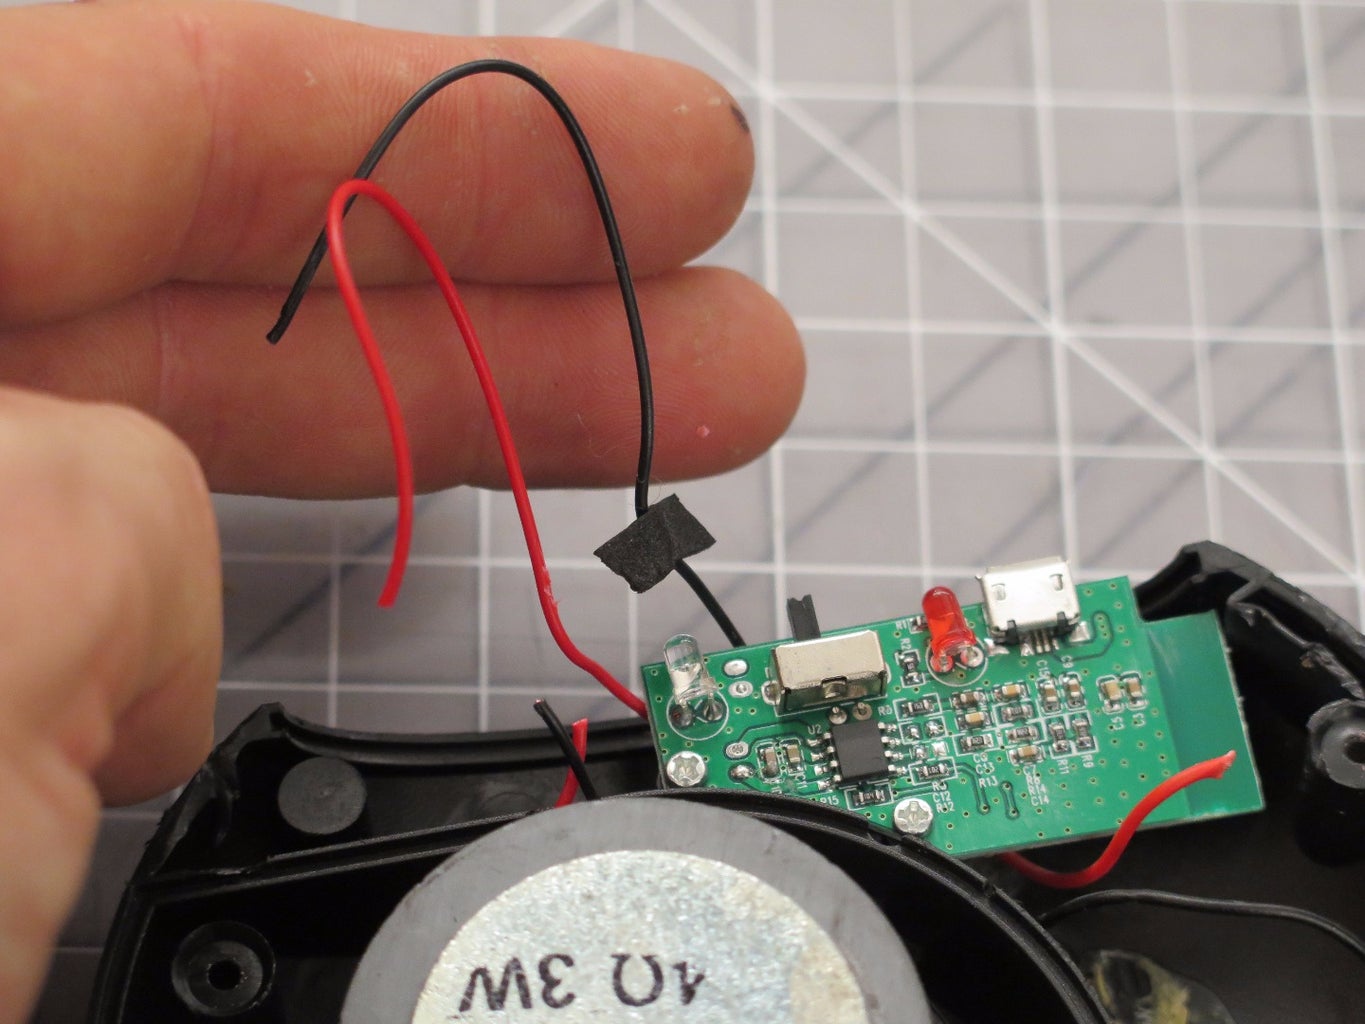


Check out what's inside. You have a circuit board filled with indicator lights, switches, the receiver, the 555 timer unit for functioning as a mini-amp, and quite a bit more.
Clip the two wires leading to the speaker and unscrew everything so it's loose. Remove the bluetooth circuit board from the casing.
Step 4: Prep the Wires


You should have two pairs of red and black wires coming from your circuit board. The first is the one that was heading to the speaker, and the second is the one heading to the battery. Put heat shrink tubing on all four, and strip them down so they have some wire exposed.
Step 5: Your Sound Jack


The 1/8" sound jack you have is quite a nifty device. Solder the red (+) to the tab connected to the center tap (the metal part sticking out the bottom that the plug snugly clicks in with. Solder the black to the ground (-) which connects to the metal case.
If you've ever wondered why audio plugs have the little black lines on them, it is in order to separate the circuit and break up the positive and negative. When they click in to this jack, you'll understand why.
Heat shrink the tubing so that the terminals are covered and won't short.
Step 6: Attach the Battery


If you've broken the battery line (which often happens), simply solder back to the + and - terminals. These are printed on the battery in case you forget which tabs are which. Look for the original solder mound if it's there so you solder to the right part.
Heat shrink the tubes to avoid shorting.
Step 7: Shrink, Plug, and Play!


You are almost to a fully functioning universal bluetooth!
Throw some large diameter shrink wrap over your audio jack, and plug it in to the input for a sound system. Flip it on and you should see it appear in your bluetooth connection settings.
Play some music, and send it across the airwaves!
Step 8: Pouch for Travel


Your bluetooth circuit is working, but it wants a place to be cozy.
I made a quick protector by cutting and hot gluing some fabric together that they main circuit could live in with the audio jack hanging out ready to go. Get creative, and make something great that also serves to protect.
Step 9: Extras! Extras!


You now have the ability to turn anything into a bluetooth speaker, and one that you hacked yourself!
You can add all sorts of things like velcro, a pouch to carry charging cords, a male-male audio card for some stereo plug-ins, and more.
If you want to read up on bluetooth technology, this is a great start.
Have fun, spread jams, and keep exploring.


