

Introduction: Marblevator, Less Simple, Less PLA.


"Marblevator, Less Simple, Less PLA" is another simple Marblevator. Consisting of only three 3D printed components along with a gear motor, ball bearings, battery pack and batteries, this model is still quite simple and uses less PLA than "Marblevator, Simple" to boot!
The model is very light and if used with steel ball bearings will slide around on a smooth surface causing unreliable operation. Therefore I decided to use 11mm nylon ball bearings to greatly reduce / eliminate the sliding while greatly improving reliability.
As usual, I probably forgot a file or two or who knows what else, so if you have any questions, please do not hesitate to ask as I do make plenty of mistakes.
Designed using Autodesk Fusion 360, sliced using Ultimaker Cura 4.12.1, and 3D printed in PLA on Ultimaker S5s.
Supplies
Soldering Iron and Solder.
Step 1: Parts.
I acquired the following parts:
- One N20 6VDC 30RPM gear motor.
- One twin AAA battery pack with switch and wires.
- Five 11mm nylon solid plastic ball bearings G1 precision.
I 3D printed the following parts at the noted settings:
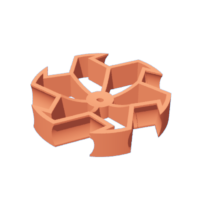
- One "Base.stl", 20% infill, .15mm layer height.
- One "Track.stl", 20% infill, .1mm layer height, with supports.
- One "Wheel.stl", 20% infill, .1mm layer height.
Depending on your slicer, printer, printer settings and the colors you chose, trimming, filing, drilling, sanding and/or polishing may be required. I carefully filed all edges that contacted the build plate to make absolutely certain that all build plate "ooze" is removed and that all edges are smooth using small jewelers files and plenty of patience.

Step 2: Assembly.


To assemble the model, I performed the following steps:
- Slid the battery pack wires through the motor compartment in "Base.stl" then soldered the wires to the gear motor such that the gear motor shaft rotated clockwise when viewed from the shaft end of the gear motor with power applied.
- Pressed the gear motor into the gear motor compartment.
- Pressed the inner portion of "Track.stl" into the inside track slots on the base towers.
- Pressed the outer portion of "Track.stl" into the outside track slots on the base towers.
- Pressed "Wheel.stl" onto the gear motor shaft then carefully adjusted the motor position such that the wheel aligned with the track.
With assembly complete, I turned off the battery pack switch, installed the batteries, turned on the battery pack switch, positioned the nylon ball bearings on the track, and off it went!
And that is how I 3D printed and assembled "Marblevator, Less Simple, Less PLA".
I hope you enjoyed it!


