

Introduction: Marblevator, Marble Launch Mechanism.


"Marblevator, Marble Launch Mechanism" was designed as a test mechanism for an upcoming project of mine, but the grandkids liked it so much "as is" I decided to publish the mechanism just in case you, your kids, your grandkids, family, friends, etc. liked it as well!
The attached video illustrates as the number of magnets are altered, the height of the marble flight changes.
As usual, I probably forgot a file or two or who knows what else, so if you have any questions, please do not hesitate to ask as I do make plenty of mistakes.
Designed using Autodesk Fusion 360, sliced using Ultimaker Cura 4.12.1, and 3D printed in PLA and Tough PLA on Ultimaker S5s.
Supplies
Soldering Iron and Solder.
Double sided tape.
Step 1: Parts.
I acquired the following parts:
- One N20 6VDC 30RPM gear motor.
- One twin AAA battery case with switch.
- Two AAA batteries.
- Four 12MM diameter by 2.5MM thick neodymium magnets.
- One 11mm diameter "nylon solid plastic bearing balls G1 precision".
- One 200CM by 120CM by 1.5CM thick marble slab (actually, I "borrowed" my wife's marble cheese board but don't tell her!).
I 3D printed the following parts at .15mm layer height and 20% infill in PLA unless noted otherwise:
- One "Arm.stl", .15mm layer height, 100% infill, Tough PLA.
- One "Axle.stl".
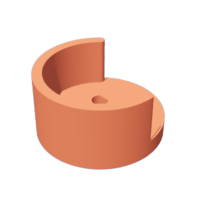
- One "Base.stl".
- One "Funnel.stl".
- One "Wheel.stl", .15mm layer height, 100% infill, Tough PLA.
The model also uses threaded assembly thus an M8 by 1.25 tap and die will assist with thread cleaning if necessary.


Step 2: Assembly.


To assemble the model, I performed the following steps:
- Soldered the battery pack wires to the gear motor such that with power applied the gear motor shaft rotated clockwise.
- Pressed the gear motor into the motor mount in "Base.stl".
- Pressed "Wheel.stl" onto the motor shaft.
- Pressed "Funnel.stl" onto the base assembly making certain the slots in the funnel aligned with the slots in the base.
- Pressed two magnets into the magnet pocket in the base such that the magnets were flush with the front of the model.
- Pressed two magnets into the magnet pocket in "Arm.stl" matching the polarity of the base magnets.
- Secured the arm assembly to the base assembly using "Axle.stl", making certain the arm rotated smoothly.
- Secured the mechanism and battery case to the marble slab using double sided tape.
With assembly complete, I placed the model on a flat and level surfaced, placed the nylon ball bearing in the funnel, turned on the battery switch, and off the marble flew!
And that is how I 3D printed and assembled "Marblevator, Marble Launch Mechanism".
I hope you enjoyed it!


