

Introduction: Installing OpenHAB on Raspberry Pi


Openhab is an open home automation bus system. It is a platform for components which are used for building automation. Manufacturer of a variety of different vendors and protocol can neutrally interconnect on a single platform. Openhab is an operating system which is independent and can be expanded by adding more bindings of additional technologies / protocols. Engineers designed OpenHAB under the Eclipse Public License and is partially open sourced . The user interfaces available are web browser , Android and Apple iOS app.
In this instructable we will be able to show you on how to install the OpenHAB on your Raspberry Pi and also how to autostart OpenHAB when you start/reboot your Raspberry Pi.
Step 1: Installing the OpenHAB Runtime Core in Raspberry Pi From Scratch


First of all access your Raspberry Pi using Putty(SSH), login to root by entering the command sudo –i. After you do this create a directory in /opt name it openhab .The following command will do the job
mkdir /opt/openhab
after that change the directory to openhab
cd /opt/openhab
Then use wget to download openhab runtime file and stores it in the current directory.
wget https://bintray.com/artifact/download/openhab/bin/distribution-1.8.2-runtime.zip
The above command will download the OpenHAB runtime. Sometimes if the above link doesn't work then click here which will lead you to the OpenHAB website as shown in image 1, in downloads right click with the mouse and copy the link location and paste it along with wget on the putty(ssh) terminal window of Pi.
In the image 2 you can see that the it shows the downloading process
Once the download is completed, you will see a terminal window as shown in image 3.This shows the download process is complete.
After the completion of download the following command should be entered
unzip distribution-1.8.2-runtime.zip
It will unzip the files in the folder /opt/openhab
rm distribution-1.8.2-runtime.zip
The above command will delete the compressed file
The image 4 shows the snapshot of unzipping.
Step 2: Installing the OpenHAB Addons


Enter the following commands to create the directory with the name addons_repo
mkdir /opt/openhab/addons_repo
Enter the folder
cd /opt/openhab/addons_repo
this will points to the current directory, this can be seen in the image 2.
This command will point to the addons_repo directory and now enter the following command to download the addons,
wget https://bintray.com/artifact/download/openhab/bin/distribution-1.8.2-addons.zip
The above command will download the OpenHAB addons. Sometimes if the above link doesn't work then click here to openHAB website as shown in image 1, in downloads right click with the mouse and copy the link location and paste.This can be seen in the image 2 and image 3 shows the downloading process.
After the downloading is complete, need to enter command to unzip
unzip distribution-1.8.2-addons.zip
and after the unzip process delete the compressed file by entering the command
rm distribution-1.8.2-addons.zip.
Enter this command
cd /opt/openhab
to move to the openhab directory. After entering, copy org.openhab.binding.mqtt-1.8.2.jar from addons_repo to the addons directory by typing the command.
cp addons_repo/org.openhab.binding.mqtt-1.8.2.jar addons/org.openhab.binding.mqtt-1.8.2.jar
Please note in our case we are using mqtt binding so we are doing this step ,any specific binding that you are going to use with openhab should be copied from addons_repo to addons folder .The advantage of having specific binding inside the addon folder instead of all bindings is that openhab will load faster.
The image 4 shows many addons binding files depending on the application user he has copy the files from addon_repo folder to addon folder for that specific application .
Step 3: General Configurations Needed for Openhab.cfg

Now type the commands
cp /opt/openhab/configurations/openhab_default.cfg /opt/openhab/configurations/openhab.cfg
The above command copies the file as shown in the image 1 where it shows the openhab.cfg file .All the default configurations are copied in openhab.cfg
Step 4: Step 4: Configuration of MQTT Broker Connections, MQTT Binding

RUN this command
nano /opt/openhab/configurations/openhab.cfg
The command open the openHab.cfg file in the nano editor.Scroll down this page till you see MQTT Transport section. Here we need to uncomment and modify the broker name. For instance in our case we are keeping the broker name as same i.e broker.
MQTT Binding configurations
modify #mqtt:<broker>.url=tcp://<host>:1883 change this to mqtt:broker.url=tcp://localhost:1883
Similarly change #mqtt:<broker>.clientId=<clientId> to mqtt:broker.clientId=openhab
Similarly change #mqtt:<broker>.retain= <retain> to mqtt:broker.retain=retain
*Note: Remove the #, otherwise openHab will treat it as comment.
After that press ctrl+X and press Y and enter to save the changes.
Step 5: Downloading OpenHAB Demo Project


To download the demo first go to the openhab folder using below command
cd /opt/openhab
then download the demo files by entering this command as shown in the image 1
wget https://bintray.com/artifact/download/openhab/bin/distribution-1.8.2-demo.zip
The above command will download the OpenHAB demo files. Sometimes if the above link doesn't work then click here to open openHAB website as shown in image 2, in downloads right click with the mouse and copy the link location and paste.
Once it is downloaded unzip it .This will give you a prompt saying same name files exist and do you want to overwrite say yes.
unzip distribution-1.8.2-demo.zip
after that delete the zip file by giving the command
rm distribution-1.8.2-demo.zip
Step 6: How to Run OpenHAB Demo Project


Now it’s time to finally run the OpenHAB.
Enter the command to run openhab .Please note it takes quite some time to start specially on Pi B+
/opt/openhab/start.sh
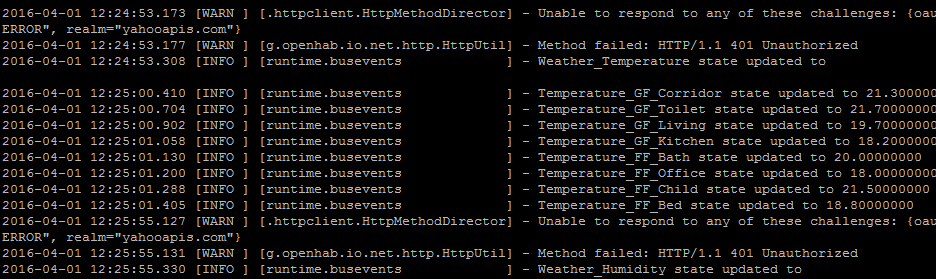
It will show the message saying Launching the OpenHAB runtime as shown in the image 1. Wait for some time to complete the process.When it's running it will add a line every 2 seconds when it receives new temperature info. If all settings are good it should give the message that openHAB has started you can viewed it on the image 2.
Now you can open a web browser and enter this address
http://192.168.1.10:8080/openhab.app?sitemap=demo (replace 192.168.1.10 with your Pi's IP address) and now you will be able to see the screenshot shown in the image 3. The demo house project has started in that you will be able to see the frames such as First Floor, Ground Floor etc.
To start the openHAB there are two methods one is manually and another is autostart. In the manual case when the user reboots or restarts the raspberry pi, he needs to run the command to start the openHAB i.e; he needs to excute /opt/openhab/start.sh command and wait for sometime, as we have mentioned this while running the demo project. To over come this we can actually autostart openHAB this procedure is describen in the next step.
Step 7: Autostarting OpenHAB on Raspberry Pi


Before starting this instructable let me thank Erich Styger, the information about autostart openHAB is taken from his blog.
As we have mentioned the disadvantage in the prvious step that every time we have to manually run the openhab by excuting the command whenever we restart the raspberry pi. This instructable tells you how to get started OpenHAB automatically started when we start/restart the Raspberry Pi.
Download the zip file with the autostart from Github.It contains two files: openhab and openhab.conf.
The script file of openhab looks like as shown in the image1.
Place the file openhab into the /etc/init.d/ directory.
Another script file with the name openhab.conf looks like as shown in image2.
Place this file openhab.conf into /etc/default/ directory.
Step 8: Follow the Following Commands for Autostart OpenHAB
Follow the following commands, execute them
Change current directory to the init.d folder by typing following command
cd /etc/init.d
Change the file attributes so it can be executed:
sudo chmod a+x openhab
Change the group and owner:
sudo chgrp root openhab
sudo chown root openhab
Verify with this command ls -al openhab
if the permissions look like this:
-rwxr-xr-x 1 root root 1821 Sep 30 2014 openhab
Change to the directory where we have copied openhab.conf
cd /etc/default
Insert the script into the run level with:
sudo update-rc.d openhab defaults
This now starts openHAB at boot time.
To stop openhab type command
sudo /etc/init.d/openhab stop
To start openhab type command
sudo /etc/init.d/openhab start
If I ever want to undo this, openhab can be removed again from the autostart by running following command
sudo update-rc.d -f openhab remove
Step 9: Verifying Whether the OpenHAB Is Autostarting

Now after the previous step, restart your raspberry pi system, Now we have to verify whether the openHAB has started running in background, to check this type the following command
ls /var/run
If the OpenHAB is running in the background you will be able to see the process id of OpenHAB as shown in image1. At any moment you can stop or start the openHAB by running the command as mentioned in the previous step.
Some of our other instructable which may be helpful
Installing Mqtt on Raspberry Pi
Installing NOOBS on Raspberry Pi
Thankyou
Armtronix Team

![Tim's Mechanical Spider Leg [LU9685-20CU]](https://content.instructables.com/FFB/5R4I/LVKZ6G6R/FFB5R4ILVKZ6G6R.png?auto=webp&crop=1.2%3A1&frame=1&width=306)


