

Introduction: The GoodNightLight: a Simple Nightlight Circuit


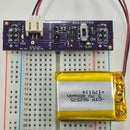


Hi all, I teach a Bioinstrumentation course for middle school students in the winter as a part of Purdue GERI (Gifted Education Resource Institute). In this course, I introduce students to basics of circuits and how we use circuits in Biomedical Engineering. I've found that a nightlight is a good introductory circuit for students learning about electronics. It includes a few basic components like resistors and LEDs. It also includes a more intermediate component, namely the operational amplifier and a useful sensor, namely a photoresistor. The mechanism of the circuit shows students how we can use circuits to interact with the outside world and produce some sort of output. In this case, the nightlight turns on when ambient light levels decrease and turns off when ambient light levels increase. Everyone loves seeing the LEDs turn on and off automatically. I told parents that I would post the various lessons online (and I'm a few months behind o_O) so here I go with the first one! Hope you enjoy my Instructable for the GoodNightLight.
Step 1: Photoresistor or Light-Dependent Resistor (LDR)

A photoresistor is a simple component that changes resistance with incident light. The resistor contains photosensitive materials that cause the resistance of the material to decrease with increased light (more light). Conversely, the resistance of the material increases with decreasing light (it gets darker). The photosensor is responsible for detecting changes in ambient light, which will actuate the nightlight. Feel free to measure the resistance of the photoresistor with a multimeter to see how its resistance changes when you cover and uncover the photoresistor with your finger or other opaque object.
Step 2: Voltage Divider

A voltage divider is a simple way of interfacing with a resistive transducer, which is a component that translates one form of energy to a resistance. In this circuit, our resistive transducer is our photoresistor. A voltage divider is composed of two resistors in series (connected one after the other). A voltage source, like a battery, is connected to one of the resistors in the divider and the other resistor is connected to ground. The equation for a voltage divider is as follows: Vout = Vin*R2 / (R2 + R1)
As we can see from the equation, R1 and R2 directly determine the output of the voltage divider. Examining the equation a bit further, we see that as R2 increases, Vout gets closer to Vin. We mentioned in our previous step that the resistance of the photoresistor increases with decreasing ambient light. We'll place our photoresistor in the R2 position of this voltage divider.
Step 3: Comparator and Output LED


A comparator is a simple circuit that compares two voltages. If the voltage at the non-inverting input (the input of the op amp with the "+" sign) is greater than the voltage at the inverting input (the input of the op amp with the "-" sign), the output of the comparator will be turn on the LED. If the opposite is true, the output of the comparator will turn the LED off. If you haven't used LEDs before, know that they light up when a small current is passed through them. Learn more about LEDs from this excellent Instructable.
For our comparator, we'll use a LM324 amplifier. The LM324 is a quad amplifier, meaning that it has 4 amplifiers built into a single package. We'll only need one of the 4 amplifiers. Wire up the LM324 as shown in the schematic.
Step 4: Conclusions and Final Thoughts
In this instructable, I have demoed simply turning on an LED with changing amounts of ambient light. Please use your creativity to turn it into a real "nightlight".
Step 5: Troubleshooting

1. In this Instructable, I recommended added a 10k resistor in series with your photoresistor. Depending on the "nominal" resistance of your photoresistor, you may need to change the 10k resistor to something else. I would recommend measuring the resistance of the photoresistor with your multimeter when your photoresistor is exposed to ambient and when the sensor is covered up by some foreign object. You want to choose a series resistor that's larger than the resistance of the photoresistor when it's exposed to ambient light, but smaller than resistance of the photoresistor when it's covered up. For example, for the photoresistor I used, it's resistance when exposed to ambient light was around 8k. When I covered the photoresistor with my finger, it's resistance increased to 48k.
2. Be sure that the that you connect the voltage dividers to the proper inputs of the op amp. Pay close attention to the connections in Step 3.
3. Be wary of the polarity of the LED. The shorter leg is "negative" and should connect to ground.


